

How to wire wrap a stone using the simple spiral cage technique. If you have a pretty gemstone or piece of sea glass without a hole, but want to turn it into a necklace, this is the easiest way to do it!

Quite a few people have asked me recently how to use stones without any drill holes in their jewellery making. Most ways involve wire and this spiral cage is the most straight-forward. All you need is some wire and your pliers!
You will need:

-0.8mm wire
-round nose pliers
-chain nose pliers
-gemstones
-necklace to put your new pendant on!
How to:
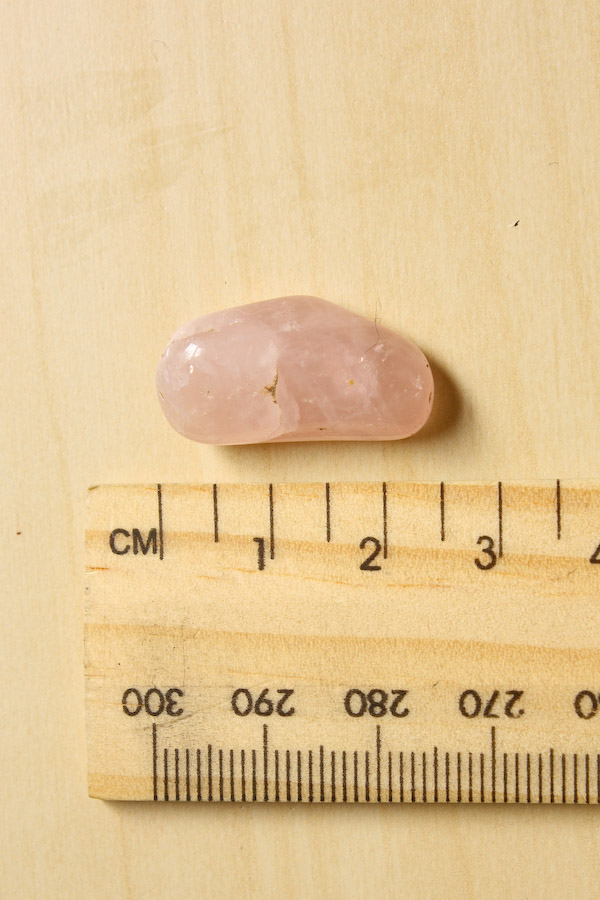
1.To work out approximately how much wire you will need, measure your stone at its longest length, then multiply by 10. So this piece of rose quartz is about 2.5cm/1 inch so means I need a 25cm/10 inch length of wire. If you have a stone that is much smaller, say only 1cm long, you may want to use 0.6mm wire. Like wise, if your stone is bigger you can go up to 1mm if needed.
2.We are going to make a shape that looks a bit like a snail shell; a tight coil in the middle, opening out wider as it goes around. To start, make a loop at one end of the wire by gripping right at the tip with your round nose pliers and rolling the wire away from you until you have a loop.
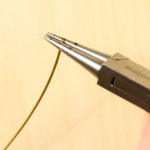
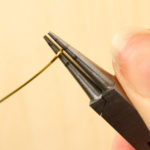
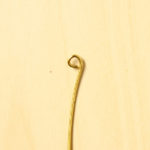
3.Take your chain nose pliers and hold the loop you have just made flat in the jaws. Push the end of the wire neatly around the outside of the loop, moving a little at a time until you have gone round twice.
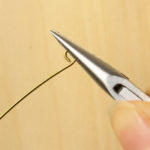
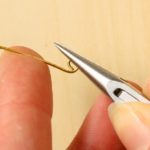
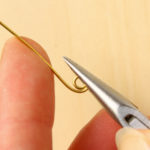
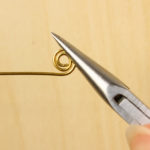
4.Now we are going to make the spiral open out a bit by gripping both the loop and a bit of the wire before pushing the wire around. Go slowly, trying to do to much in one go will make angles rather than a nice curve. Keep going until you are halfway along the length of your wire. At this point you want your spiral to be as wide as your gemstone, so it will fit.
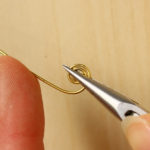
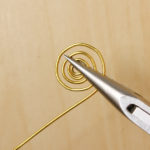
5.We are going to repeat steps 2 – 5 with the opposite end of the wire, rolling your initial loop in the other direction, so you end up with something that looks like a curly letter S.

6.Bring the two spirals towards each other slightly, then using chain nose pliers pull the tight coil in the middle of one spiral up so it opens out like a beehive. Repeat with the other side.
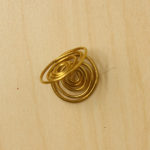
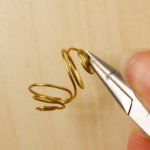
7.Slide your gemstone in the spiral and bring the two halves together, caging the stone inside. No stone will be as round as the cage, so use your fingers to manipulate the wire to fit the stone and arrange the coils evenly.

8.Make a loop at one end of the cage by using your chain nose pliers to lift up one of the inner-most coils
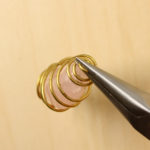
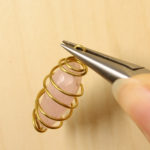
9.Your pendant is now ready to hang from a necklace!

This is just one method you can use to wire wrap a stone. I plan making more tutorials for different techniques. So if there is one you are interested in, feel free to comment below or message me on Twitter, Instagram or Facebook! Want even more modern craft, creative inspiration and lovely ready-made jewellery? Sign up to my monthly ‘Making, Creating and Little Adventures’ email! Happy Making!
Is it possible to do videos on how to.
Hi Samantha, I’m afraid I find video much harder than still photography, so am not likely to do full video tutorials anytime soon! But I am looking at doing little clips for simple things.
This is awesome. How can I learn this with a flat gem? TIA
You can start by creating a loop, then wrapping the wire around the stone. I will look into creating a tutorial for flatter stones!
Cool
That is just so clever!!! will try it as soon as I can get some wire!!!!
Thanks!!
Thank you so much for the instructions as this is my first try at wiring a stone. It turned out beautiful.
Thank you Dianne!
Great information, personal I love the photos. Followed the directions well. I’m a visual learner and I think you did a great job.
Thanks Rebekah! I’m a visual learner too
I will like some instructions and directions on how to fuse argentium silver wire. Thank you.
I’m afraid I haven’t used argentium wire, only sterling silver which can’t be fused. Sorry! Emma
Any chance you have an idea for the same thing but for a stone that was broken in half? I have a 2 inch long quartz that was gifted to me and unfortunately broke almost perfectly in half but id love to learn a cute but secure way to wrap ìt so i can wear it again. Thanks!
Hi Nicole, I’m planning to do another wire wrapping tutorial that might help with this! Make sure you keep checking back or follow me on social media so you don’t miss it! Emma
Very well written instructions. Thanks. Look forward to more
Awesome tutorial! I drilled some holes in some flat agate stones, but want to do more than just hang them from a link. Something like this might work. Any ideas?
You can experiment with making a functional link, but then creating decorative swirls down around the stone?
Can you translate the 0.8mm and 0.6mm into the common gauge measurement? Or can you recommend a site that converts it? I’m used to buying my wire by the gauge measure, and can’t figure out what size that would be.
For earrings, I like 20ga, while some friends prefer the slightly narrower 21ga.
This really looks like a fun method. I look forward to trying it.
Kind regards,
Janice B
Hi Janice, 0.8mm is equivalent to 20 gauge and 0.6mn is 22. I’m based in UK where we use mm as standard and I always forget that other countries don’t! There are lots of charts available to download – just search wire gauge to mm. Emma
Thank you! I “speak” US and mm and UK sizes just fine when it comes to my knitting needles but had never come across the mm sizing on wire. I’ll be aware of that. If it’s common, of course there will be charts aplenty online. Thanks very much.
Kind regards,
Janice B
No problem! It can get so confusing when we all use different terms for the same things! I’m constantly caught out by the different US/UK crochet terms. Emma
Can you use a Wig Jig to do that?
Yes! The spiral maker pegs that you can get for the Wig Jig would make this really easy!
Hi Emma, I would like to make a wire wrapped stone bracelet with 12 small stones I found on a California beach. Am I crazy!? I am a beginner in that I have wire wrapped a couple of stone or shell pendants and that is all! Have you ever made such a bracelet? Where do I begin?
Thank you,
Elena
Hi Elena, you aren’t crazy You can totally use this method to make a bracelet by making a loop at both ends then joining then together with jump rings! You might need to use a thinner gauge wire if the stones are really tiny too. Emma x
Thank you….. that is a very simple and easy way to wrap…. to sell and not spend so much time ….
Would my result “s” shape be opposite since I am left handed?
It might (I’ve found that there is a lot of variation in how left handers do things!), but even a backwards “s” will be fine!
It might (I’ve found that there is a lot of variation in how left handers do things!), but even a backwards “s” will be fine!
I’m not sure one’s “handedness” makes that much difference in making swirls and curls like these. I have to be very careful when I make mine that I get things going the right way for the second earring. (I often like to do mirror images when I make earrings.) I am right-handed, but sometimes the first swirl goes left and sometimes the first swirl goes right.
I second Emma: it doesn’t matter for this type of thing.
I have come up with a good way to teach my left-handed friends how to do something where it does matter (I sometimes tutor in knitting.) My left-handed friend sits directly across from me and mirrors everything I do. When I’m tutoring a right-hander, she will sit next to me and look over my shoulder. A lefty sits across from me. Problem solved!
Pingback: Wire Wrapping a Stone – Netting – Inspiration Crafts
Hello, I tried today following your instructions. It is a little bit difficult as my stones are not very big and hard to manipulate but it is awsome THANKS
It is definitely harder with small stones, but I’m glad you persevered!
Me encanto muy bien explicado, Gracias por compartir conocimientos!!!
Pingback: How to Wire Wrap a Pendant - 14 Cool Ideas! * Moms and Crafters
Pingback: 10 DIY Stocking Stuffer Ideas for Women – Stylish Gifts
Thankyou very much such a valuable info helped me a lot.