

This Beaded Statement Collar Necklace uses wooden beads and thread to create a lightweight, dramatic piece of jewellery, perfect for adding a splash of colour to any outfit!
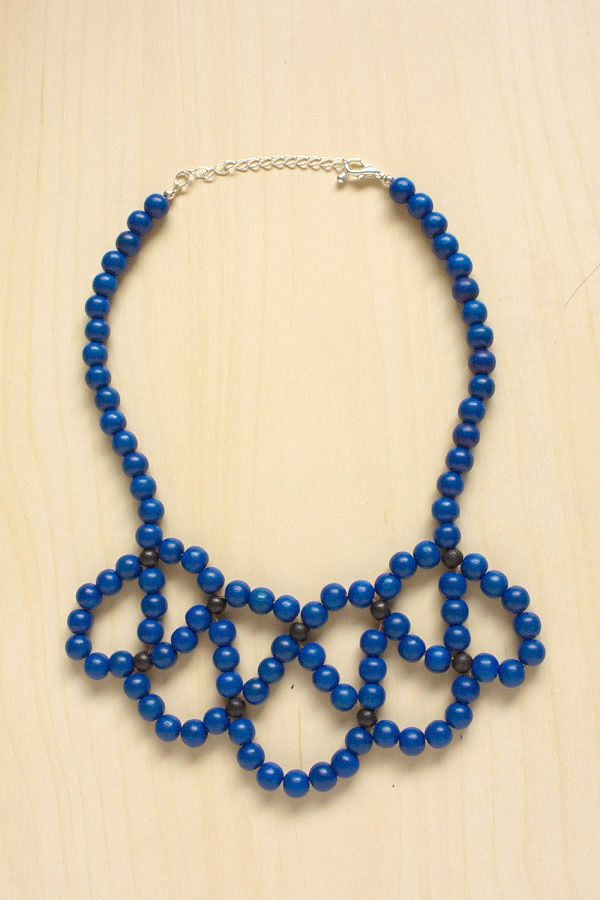
Everyone loved last Statement Summer Necklace so much that it is still one of my most visited post and has even been turned into a workshop! So I wanted to have a go at a contemporary take on another traditionally small beadweaving technique, this time it is netting! Netting is an ancient form of beadwork; the Egyptians used the technique to create shawls and even dresses!
You Will Need:
–1.5metres of s-lon thread or clear 0.25mm Supplemax
–Bead stopper or ‘stop’ bead
–2 x 6mm Jump rings (optional)
-Chain nose pliers

How To:
We are going to be working from right to left following this pattern; don’t worry, we are going to break it down step by step! The smaller 6mm beads are in black and these have the thread going through twice, just be careful to note in the instructions if the thread should go up or down through them.
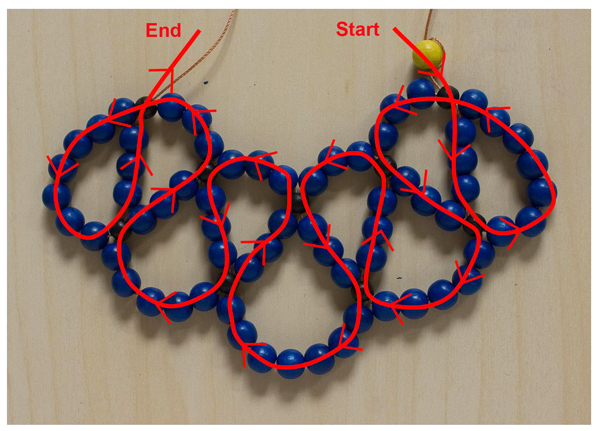
1.If you are using a bead stopper place it 30 cm from one end of your thread. Or, if like me, you cat has stolen your bead stopper, you can use what is called a stop bead- this is just any old bead that is preferably a different colour or size to your other beads use to mark the end of your beading and stop everything from falling off! Take the thread through once, then loop it around the outside and back through in the same direction, move to 30cm from one end and pull tight.

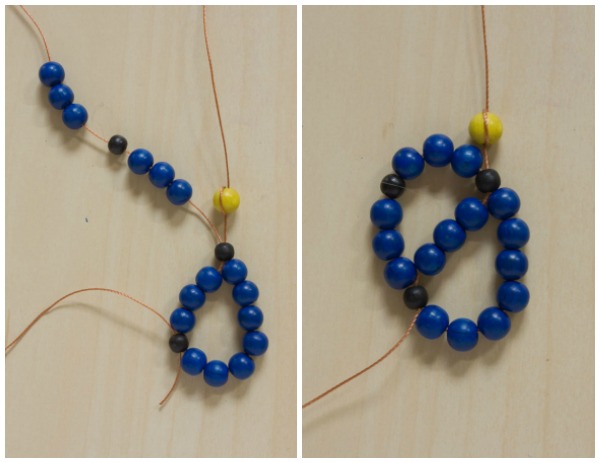
2. Working with the long end of the thread, add on 1x6mm bead, 3x8mm beads, 1x6mm bead and 7x8mm beads. Take the thread back up through the first 6mm you added and pull tight.

3.Add 3 x 8mm, 1 x 6mm and 3 x 8mm beads and go down through the second 6mm bead you added in step 2.Pull tight.
4.Add 5 x 8mm, 1 x 6mm and 3 x 8mm beads then go up through the 6mm added in step 3 and pull tight.
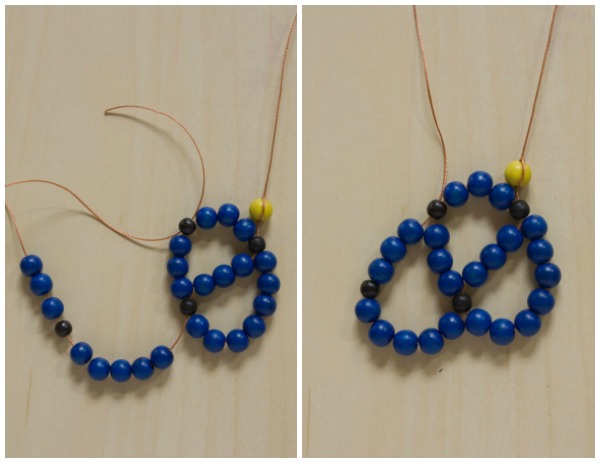
5.Add 3 x 8mm, 1 x 6mm and 3 x 8mm and go down through the 6mm added in step 4 and pull tight.

6.Add 7 x 8mm, 1 x 6mm and 3 x 8mm and go up through the 6mm added in step 5 and pull tight. This step creates the centre of the necklace, we are halfway through!

7.Add 3 x 8mm, 1 x 6mm and 3 x 8mm and go down through the 6mm added in step 6 and pull tight.
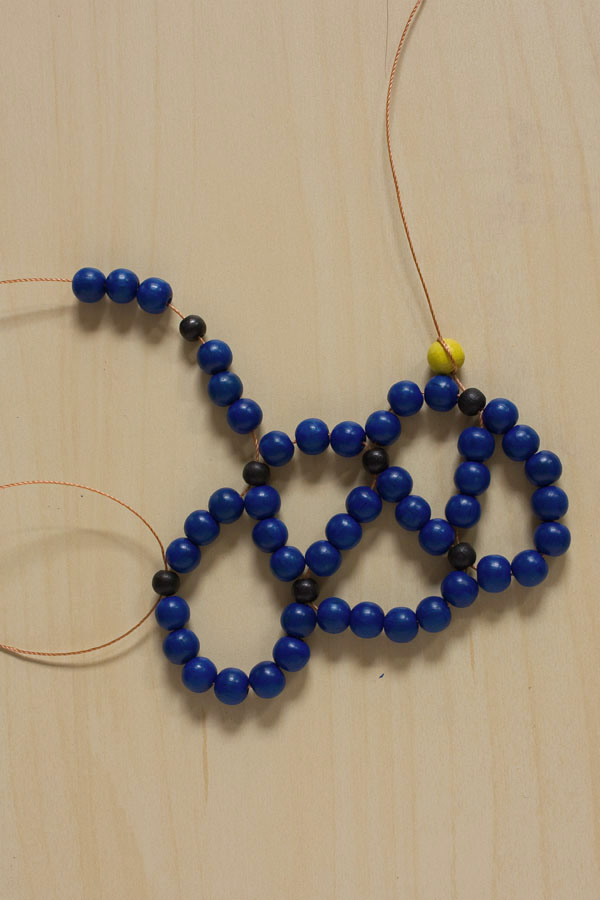
8.Add 5 x 8mm, 1 x 6mm and 3 x 8mm and go up though the 6mm added in step 7 and pull tight.
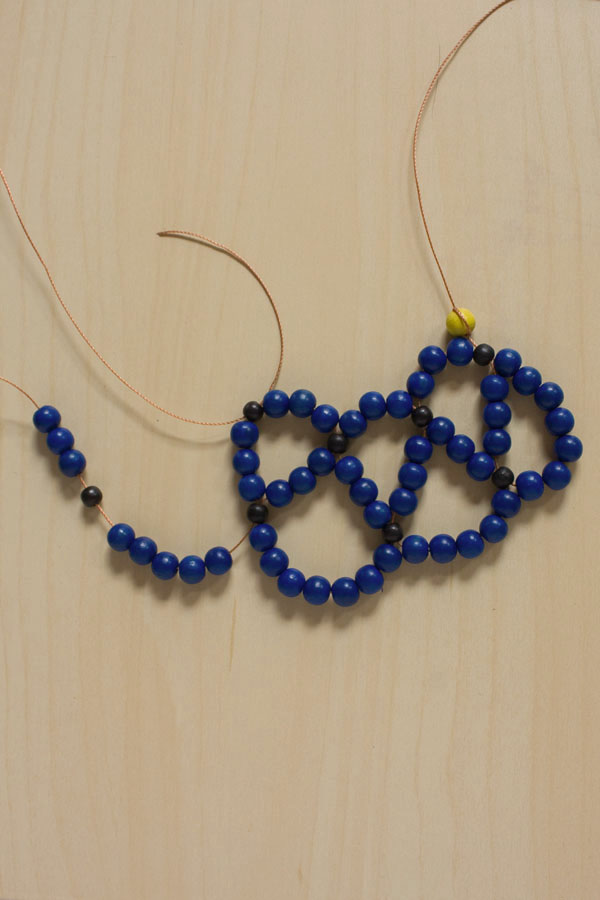
9.Add 3 x 8mm, 1 x 6mm and 7 x 8mm and go up though the 6mm added in step 8, pull tight.

10. Add a final 3 x 8mm beads and go up through the 6mm added in step 9. Pull the thread tight, making sure you have no gaps anywhere in your beading.
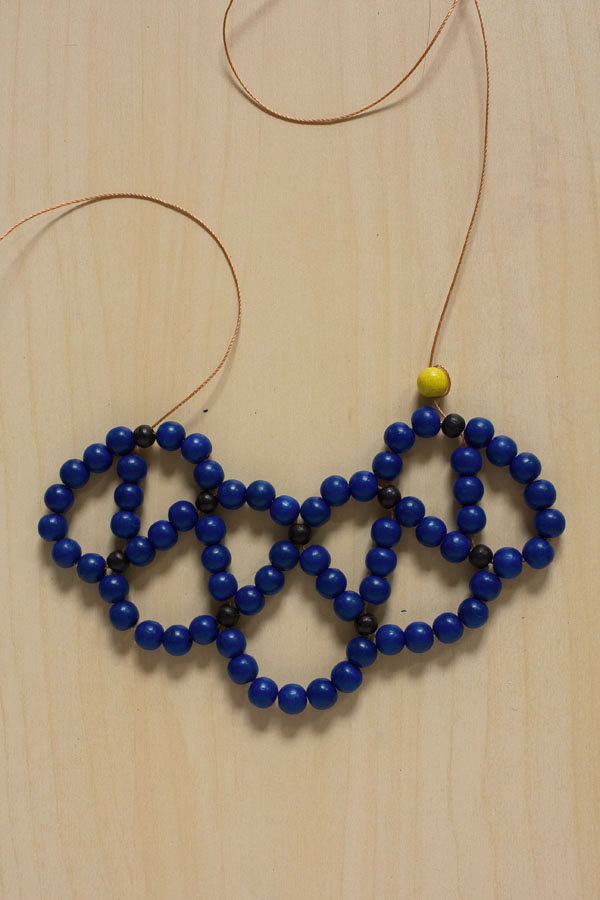
11.Divide your remaining beads up and thread half on one thread and after removing the stopper bead from the starting point half on the the other.

12. Slide a necklace end onto each end, tie a double knot and close the cups. Use the hook on the necklace end to add a clasp on one side and an extension chain on the other. This make a necklace that is adjustable from 16″ to 18″ or 40cm to 45cm, depending on your tension.


If you have a go at making your own beaded statement collar necklace, or have any questions feel free to comment below or message me on Twitter, Instagram or Facebook! Happy Making!
Pingback: 17 Amazing DIY Spring-Inspired Jewelry Projects - Style Motivation
Pingback: 17 Easy to Make DIY Statement Necklace Ideas - Style Motivation
Pingback: 17 Easy to Make DIY Statement Necklace Ideas – chuckiesblog
Pingback: 17 Easy to Make DIY Statement Necklace Ideas – Ctacy
Love that Beaded Statement Collar Necklace DIY!!! So creative…..it came out really beautiful!!! Thanks for sharing!!