

What is Needle Felting? Its the technique of taking fluffy wool roving and stabbing it with a special barbed needle to create felted objects. . Felting tangles the loose wool fibres to make a solid felt fabric. It is similar to traditional wet felting, were you felt wool using hot water and soap. but needle felting allows you create 3d shapes a lot easier, and because there is no water involved, doesn’t need time to dry.
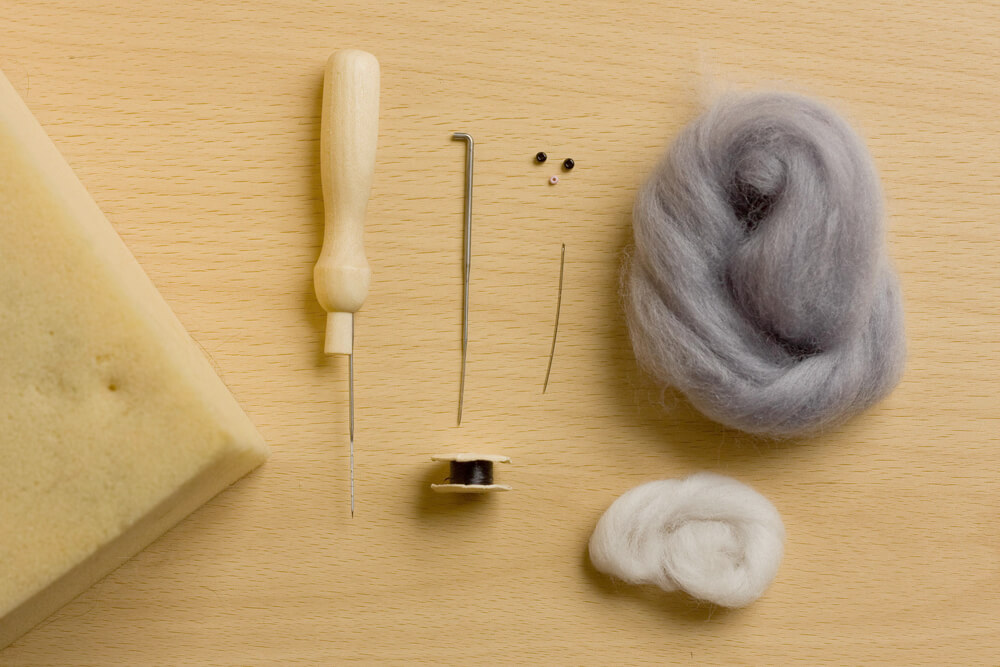
Materials and Tools for needle felting
Felting Surface
The most common surface to felt onto is a foam pad. This is just a small piece of upholstery foam. It should be no less than 5cm thick and anything from 10-30cm square. You can buy ones with a felt cover, which helps create a flatter and more even surface. The other type of surface is a brush. This is a dense brush, with the bristles upwards. Felt is less likely to stick to this as you work. The choice of felting surface is personal choice; I recommend starting with a foam offcut, as it is the most cost effective option.
Wool Roving
Most people use roving, which is wool that has been carded and brushed, but not spun into yarn. You can get different varieties of roving, but merino and corridale is great for most needle felting uses. There are also carded wool tops – this is wool that is carded, but not brushed, so the fibres are all in alignment. This means the fibres go in different directions and this actually makes the felting process easier!
You can also get core wool, which is even rougher, and felts really quickly. It is generally quite lumpy and only comes in natural colours, so you usually then cover it in roving or tops to get a nicer finish.
Felting Needles
Felting needles come in different profiles; triangular, star and twisted, as well as a variety of gauges. They all have a sharp tip and a triangular cuts in the sides and as the needle goes in and out of the roving, it matts and felts the fibres together. The cuts are often referred to as “barbs”, but that suggests they stick out. But they are actually little cuts in the sides of the needle.
I recommend starting with a 36 gauge triangular needle for basic felting. I also like to use a 38 gauge star to create a smoother finish. .***Warning: Felting needles are VERY SHARP!***
Needle Holders For Needle Felting
Felting needle don’t come with a handle, and this can get uncomfortable to hold after a while. Holders are wooden or plastic handles that hold either a single or multiple needles. Multiple needle holders also have the bonus of helping to speed up the felting process, as you get more felting per stab!
I suggest starting with a holder with three needles to begin the felting process, going down to a single needle for finishing touches. If you are creating large or flat pieces, you may want to start with five needles. But the more needles the tougher it is to stab the wool.
How To Needle Felt
1.To begin felting gently pull out some roving. Avoid cutting roving- instead, hold the tip and gently pull a section free.

2.Start rolling up the roving, folding each side in as you go so it forms a tight ball. The aim is to get the roving rolled up as tightly as you can now, to make the process of needle felting easier. The less air and gaps in this ball, the quicker it will be to felt.

3.Holding on to the balled up roving, begin to stab up and down with the needle. A few stabs should begin the felting process and the roving will start to hold its shape. Once this happens start to rotate the ball around as you stab, as needling repeatedly in one spot will create a flat area.
Start felting slowly, but once the roving starts to hold together and as you begin to gain confidence, start to speed up. Needle felting takes LOTS of stabbing the wool, so going too slowly can mean it takes ages, and you will likely get frustrated. It can take a few goes to find the balance between going fast enough to see progress, but not so fast you stab yourself!
Always try to keep the needle going in and coming out at the same angle, to help prevent the needle breaking. It is a good idea to stop occasionally and roll the ball around in the palms of your hands, as this will help identify any spots that are still loose and require more needling.

4. To Make a Felt Ball Keep felting until it feels fairly solid, but will spring back slightly when pressed. Constantly turn the ball around otherwise you will get flat spots. You can then use a finer 38 star needle at this point to smooth the surface and get rid of any fluffy ‘fly-away’ fibres. To create smooth finish, insert and remove the needle a lower, 45 angle. This stops the surface from getting a pitted appearance and tucks any loose fibres in.

Now you have learnt the basics take a look at my needle felt projects – make a needle felt cactus or felted bunny !
If you have any questions about learning how to needle felt, feel free to comment below or message me on Instagram or Facebook! Happy Making!
Thank you, I am interested to start needle thread and this tutorial makes it so much easier to understand.
Brilliant, just be patient and it will come together!Let me know how you get on!