

The Larks Head Knot is one of the fundamental knots in macrame. Also known as a cow hitch knot, it is often used at the start of hanging projects to attach cords to a wooden dowel. But there is more than one way to tie this little knot! I’m going to show you step by step 3 ways to tie a lark’s head knot in three ways: basic (right way round and wrong side round!), continuous and running!
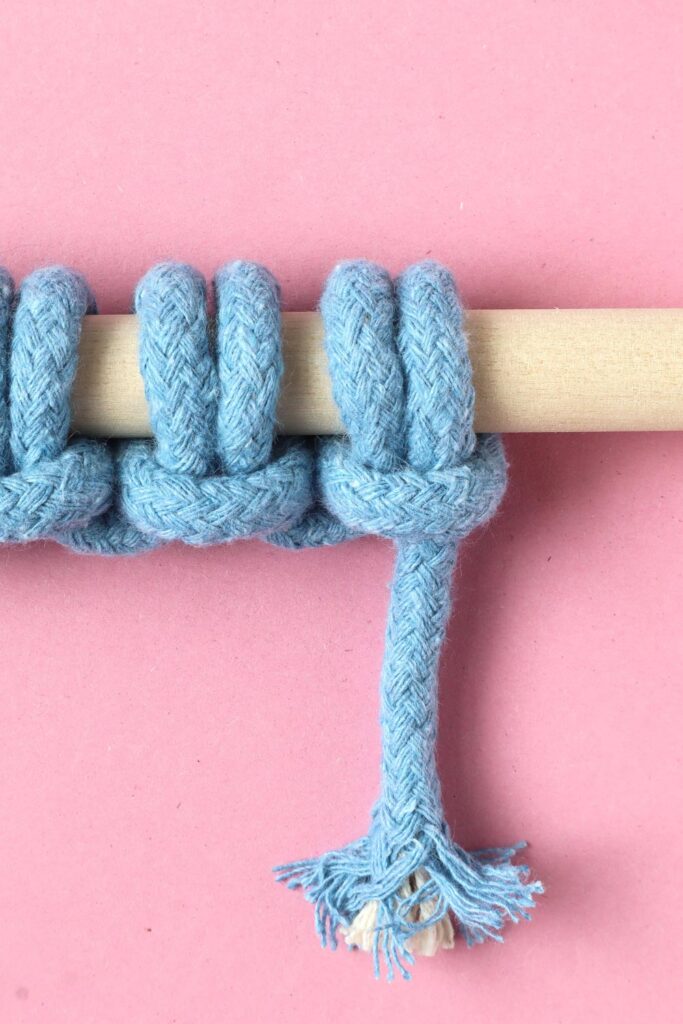
How To Tie A Lark’s Head Knot – Basic
The most common way we use lark’s head knots is to attach cords to a wooden dowel at the start of a wall hanging. It always begins with the cord folded in half . I’m going to show you two ways of doing this, starting with that way I think is easier, but actually ties the knot back to front. You can then flip your work over so it is the “right” way around. Then i will show you how to tie a lark’s head knot so the right side is on the front. Just choose whichever way works best for you.
1.Fold your cord in half and place the mid-point under or behind the dowel, creating a loop.

2.Bring the loop down over the front of the dowel, so you can see the cords behind.

3. Reach down through the loop and pick up the cords.

4.Pull the cords all the way through the loop.

5.Pull the cord ends until the loop tightens around the dowel.

6.This is actually the back side of a lark’s head knot! but I find it so much easier to tie (and to teach) this way. Simply flip the dowel over to get the front side facing you.

7.The front side of a lark’s head knot has the horizontal band of cord, and it is normally this side you have on the front of the finished piece. So if you also find it easier to tie lark’s head kntos this way around, tie all the knots your need, then flip the dowel over to continue with the rest of your project.

8.To tie a lark’s head knot the right way around, place your doubled over cord in front of the dowel, with the loop of cord at the top.

9.The take the loop of cord down behind the dowel.

10.Then take the cord ends down through the loop

11.Pull the cords all the way through and tighten to get your right-side up lark’s head knot. There is no right or wrong way to tie this knot, choose whichever feels best for you. Just make sure that the front of the knot (with that horizontal band of cord) is on the front of your work before you continue with the rest of your piece.
How To Tie A Lark’s Head Knot – Continuous
This method of tying the lark’s head knot is great if you are working from a reel of cord and are able to slide each knot onto the end of your dowel or holding cord. I use this method in my Macrame Rainbow Pattern to create a fringe effect!
1.Lay the doubled over cord out in front of you, with the loop at the top.

2.Bring the loop towards you, and lay it over the top of the cord ends. It should look a bit like a heart!

3.Pick up the cords in the centre of the “heart”.

4.Allow the loops of cord on each side of the “heart” to drop down slightly.

5.Slide your dowel through the loops.

6.Pull the cord ends to tighten onto the dowel.

How To Tie A Lark’s Head Knot – Running
The running lark’s head knot is used to tie a row or sennit of knots, with just one end of cord. I struggled with this one when I first tried it, but once I broke the knot down into simple steps, it became super simple to do!
1.Start by creating a lark’s head knot using one of the previous methods. You want one end longer than the other. I’m going to create a row of lark’s head knot moving down the dowel towards you.

2.Bring the long end across over the dowel. This creates a loop of cord on the other side.

3.Bring the cord back under the dowel and up through the loop

4.Pull the cord tight.

5.Then take the cord under the dowel, this will create a loop on the other side again.

6.Then bring the cord over the dowel and down through the loop.

7.Pull tight to complete your lark’s head knot.

8.I like to repeat the mantra “over and up, under and down” to myself when I start tying running lark’s head knots, and I soon get into the rhythm.
I hope you have found this post on how to tie lark’s head knots useful. If you have any comments or questions, pop them below and I’ll get back to you. If you want to learn even more macrame, look at my other macrame tutorials, macrame kits and digital macrame patterns.
