

Make your own macrame bunny ear headband, perfect for Easter and spring! All you need is some cord, a plain headband and an optional bit of wire if you want your ears to bend and move.
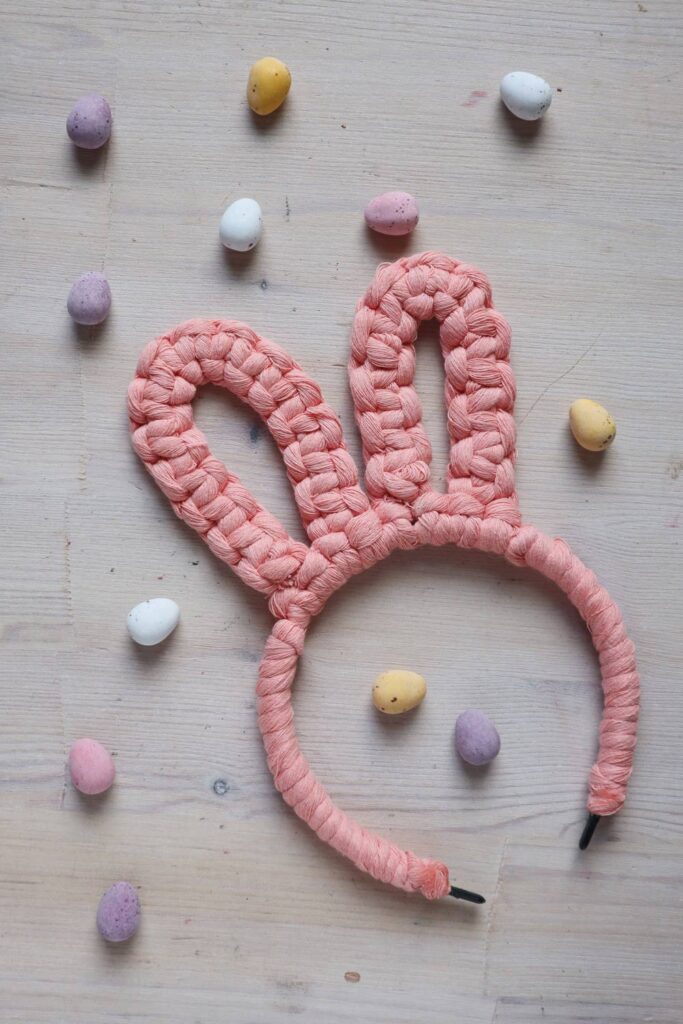
If you know basic macrame knots, this will be a breeze! If you are new to macrame, worry not! I will take you through step-by-step. I’m using a 5mm single twist string from ReTwisst, but if you are new to macrame, I recommend choosing a 3ply rope as it is much easier to handle. You can read more about the different types of macrame cord on this blog post.

Materials and Tools:
- 4 x 150cm (5ft) of Cotton Macrame Cord, (3mm, 4mm and 5mm work best)
- Plain headband
- 2 x 30cm pieces of wire
- Scissors
- PVA/ White Glue
Attaching Cords To The Headband
1.Lay your head band on your work-surface, with the top towards you. Take one of the 1.5m/ 5ft cords and fold it roughly in half (we will adjust the lengths later). Put the folded midpoint underneath your headband to create a loop.

2.We are going to create a Larks Head Knot to secure the cord to the headband. To do this, bring the loop back down over itself and the headband.

3.Bring the cords up through the loop.

4.Before tightening the knot, we are going adjust the length of the two ends, so we have one about twice as long as the other. Hold one end shorter than the other and gently tighten, loosening the loop around the headband if you need to until the longest end is at least 1m / 3ft long.

5. Once you are happy with the lengths, pull the knot tight as you can against the headband. Repeat all of these steps to attach three more cords in the same. You want to space them in two pairs, slightly off from the centre of the headband, ideally with the shorter cords next to each other in the centre of the pairs (but don’t worry if you can’t!). When all four cords are attached, turn the headband over, so you can see the horizontal bumps of the cord.

Making Macrame Bunny Ears
We are going to use the square knot to create our bunny ears! It is one of the most popular macrame knots. Then the ends will be attached back onto the headband using Larks Head Knots, but tied in a different way to before! It helps to secure both the headband and the holding cords down to your work surface with some tape. The wire is totally optional, but it means you can bend the ears over which is just the cutest thing! I am using a 1.5mm aluminium wire, but garden wire would work perfectly well.

1.Choose one pair of cords, so you have four ends to work with. The shorter two cords in each pair will be our holding cords. This just means that they don’t move and we knot around them with the longer cords, which are called the working cords. Put the shorter holding cords together in the middle, with one longer working cord either side. If you want to add the optional wire, cut a 30cm / 12″ piece and place it in the centre.

2.Use the working cords to square knot around the holding cords, until the working cords are no less than 25cm / 10″ long. If you are new to square knots, pop over to my step-by-step guide to tying square knots post!

3. Trim just the holding cords, being careful to leave the working cords long so we can attach them to the headband. You can also trim off any excess wire (if you were using it), making sure it is completely covered by the square knotting.

4.Bend the square knotting around to make an ear shape and to make life easier, cover the ends of the cord in some tape. Start with the cord nearest to the existing knots attached to the headband. To make the Larks Head Knot, take the cord over the headband and back underneath it on the left side.

5. Bring the across on top of the square knotting, then under the headband.

6.Come back over the headband and down through the loop of cord. Tying the Larks Head Knot in this way can seem confusing at first. I like to break it down into the steps Over and Under, then Under and Over. Covering the cord ends in tape also helps with tying this knot.

7.Once the knot is pulled tight it should look just like the Larks Head Knots we made at the beginning to attach the cords to the headband.

8. Repeat from step 4 in this section to make a second Larks Head Knot with the other cord.

9.To secure the cords, tie a half knot (the knot you start to tie your shoelaces with) on the back, tighten and trim the ends.

10.Follow all the steps again to make the second macrame bunny ear!
Wrapping The Headband
You can finish your macrame bunny ears at this point, especially if your hair will cover the band. But if you want to cover the rest of the head band, follow the next few steps.

1.Cut a 1m / 3ft piece of cord and tie it on to the headband, next to one of the ears. You want one short end about 5cm / 2″ long.

2.With the short end lying along the headband, begin to tightly wrap the other longer end around.

3.Keep wrapping until you are 2cm / 1″ away from the tip of the headband, then tie a knot by making a loop and bringing the end through to secure.

4. Pull tight, trim off the excess, and add some PVA/ white glue onto both the cord end and where the cord is wrapped around the headband (this is to stop it slipping off!)

5. Repeat this with another 1m / 3ft piece of cord on the other side to finish your macrame bunny headband!
If you are looking to take the next steps in your journey as a macrame beginner, take a look at my ebooks and kits! And sign up to my monthly email, The Loop, for top tips, news and subscriber offers.
