

A modern take on traditional Scandi and German straw stars, these stylish straw star decorations use metallic paper straws and thread and are perfect for Christmas and events!

Traditionally these stars and snowflakes are made from real straw and red thread, but not having a ready supply of straw on hand, I came up with this contemporary version using paper ones. Using metallic straws means they sparkle which is ideal for Christmas, but given all the gorgeous patterns now easily available you can tailor them to pretty much any occasion!

You will need:
-Paper straws, 6 per star. I used these from Sainsburys, but similar are available on Amazon*
-Scissors
-Thread; any embroidery thread, crochet cotton or bakers twine will work nicely
-Scissors
–Folding Tool or similar to flatten the straws
–Macrame foam board or similar and push pin/thumb tack
*if you don’t have a macrame board you can use a little bit of hot glue to hold the straws together*

How to make-
1.Flatten 6 straws using a folding tool or the side of a ruler.

2.Our star is made up of a small star and a large star attached together and we are going to start by making the smaller one. Cut two straws in half to give four pieces. Working on your macrame board, stack them one on top of each other to form a star. If gluing, place a small blob of hot glue in the middle of each straw to hold them together.

3.Cut a 50cm length of you thread, and begin by placing it on top of the uppermost straw.

4.Leave a tail of about 10cm and using the longer end, begin weaving under and over the straws. It is really important that the straw on the top of the stack is an ‘over’!

5.Once you have gone all the way around tie the two ends together to help hold it all together.
6.Then go around twice more to make the star sturdy. Knot the ends together again and trim off the excess thread.

7.Now to make our 2nd, bigger star. Take your remaining 4 full size straws, flatten them with the folding tool and lay them in the same star formation as before, either pinning to a board or gluing as you go to hold.

8.Repeat steps 2-6, the only things you need to change is to alter the length of thread to 1 metre and NOT cutting off the threads after you have woven them around.

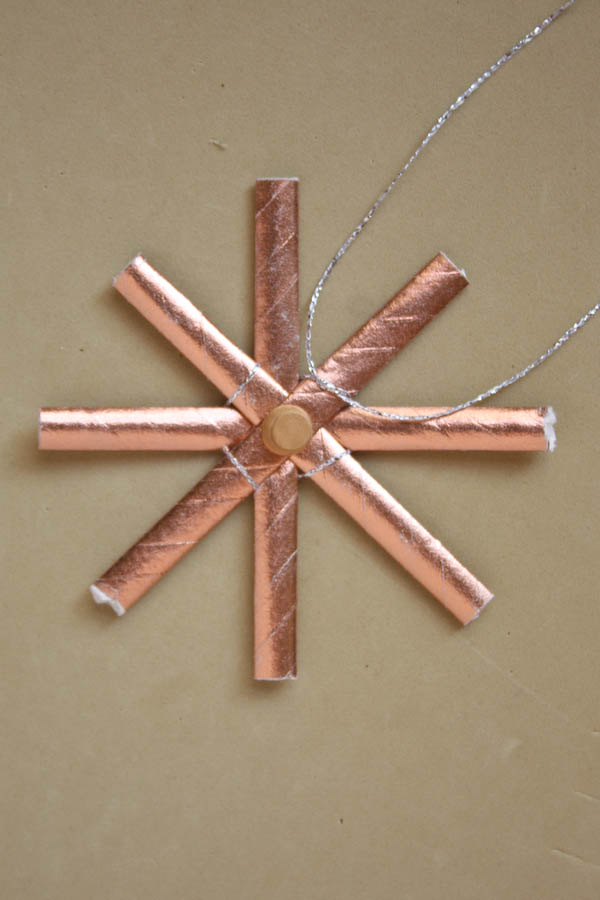
9.Place the smaller star on top of the larger so the short points are in between the longer ones.

10.Weave the two stars together using the long length of thread still attached to the larger star. Go over the short points and under the larger. This will create a second line of thread further out from the first. You only need to go around once.

11.Tie the ends of thread together to secure, trim off the shorter end and leave the longer end for hanging! If you want a longer hanging thread, just use a longer piece of thread when making the second star.

I also made a couple of mini stars by making the small star the ‘larger’ star, and making a super small one by cutting a straw into 4 pieces. They are a bit fiddly, but I like having the two size options!
Please share this tutorial if you enjoy it and if you have any questions, leave a comment below or come and find me on Instagram ! Want even more modern craft, creative inspiration and behind the scenes of my life as a jewellery maker? Sign up to my monthly ‘Making, Creating and Little Adventures’ email! Happy Making
