

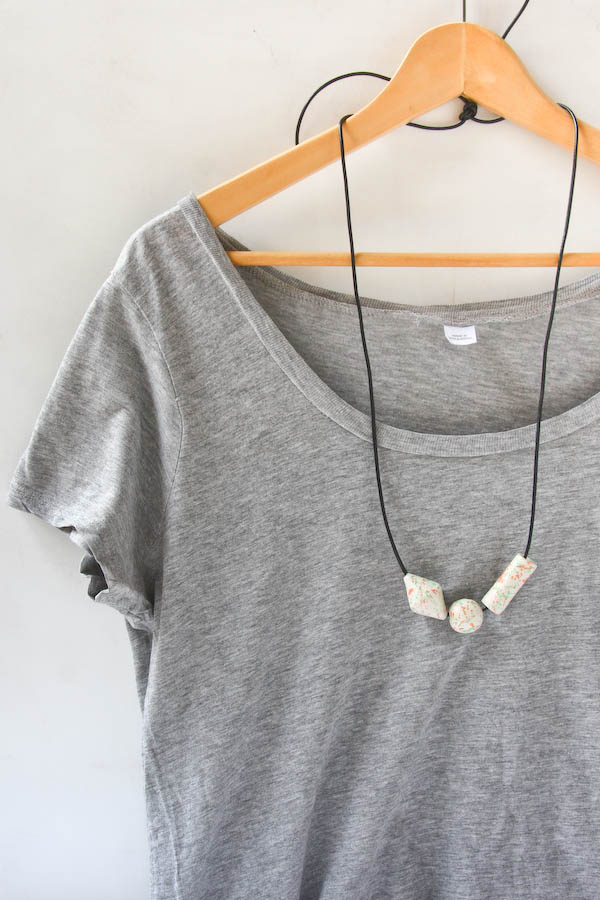
These Air Dry Clay Beads are fun to make and fun to wear! I will show you how to shape three different beads, paint and finish, all ready to thread onto a necklace.
Is anyone else obsessed with The Great Pottery Throw Down? Its like the Bake Off, but with ceramics! I would highly recommend watching if you haven’t seen it, if only for judge Keith Brymer Jones getting so emotional over pots. This make is perfect if you are itching to get your hands dirty with some clay, but don’t have acess to a kiln, as I’m using air dry clay! And because its so easy to use, air dry clay can easily be used with kids, just bear in mind the beads will need a few hours to dry out before you can paint them.

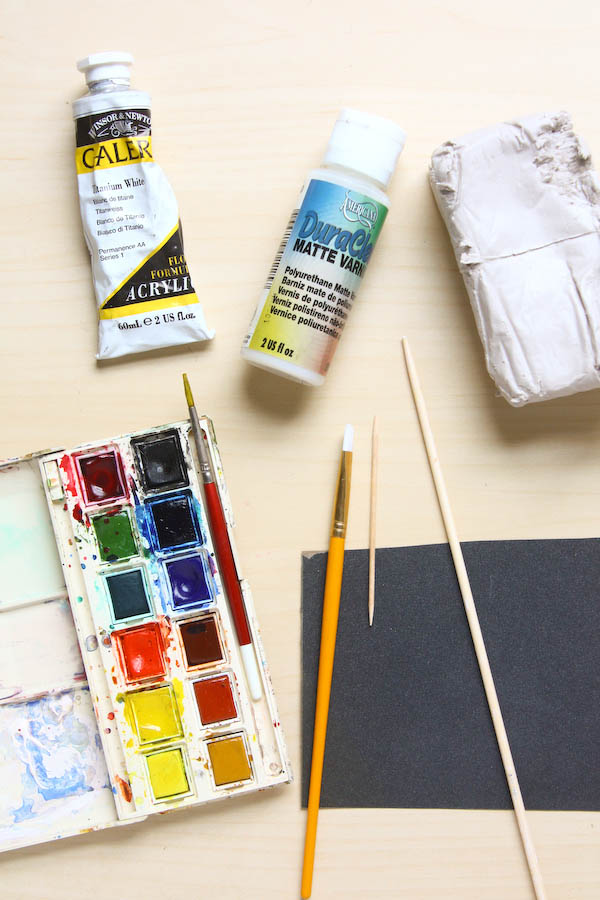
You will need:
-Cocktail Stick
-Knitting Needle or Skewer
-Watercolour or Acrylic Paint
-Fine Sandpaper
– Varnish*
How to make Air Dry Clay Beads:
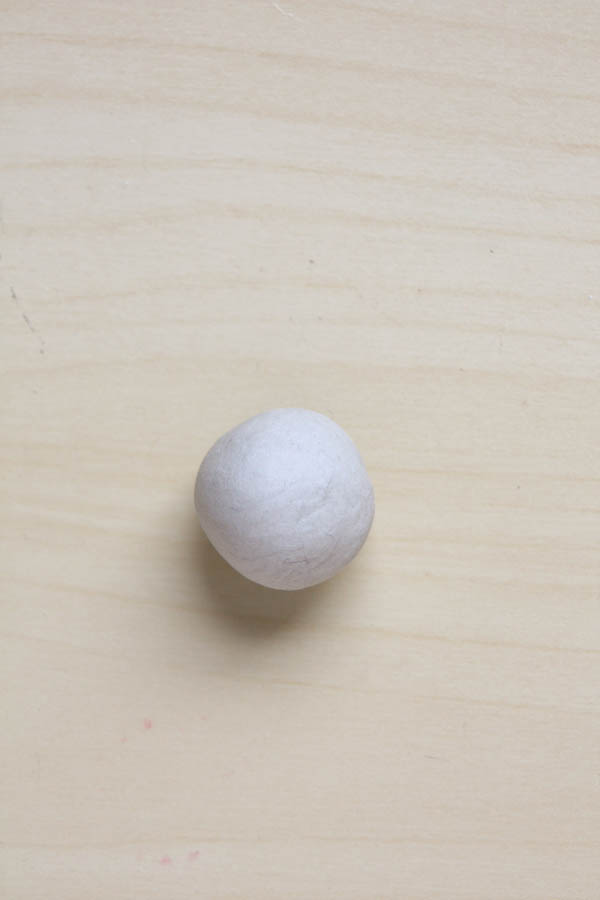
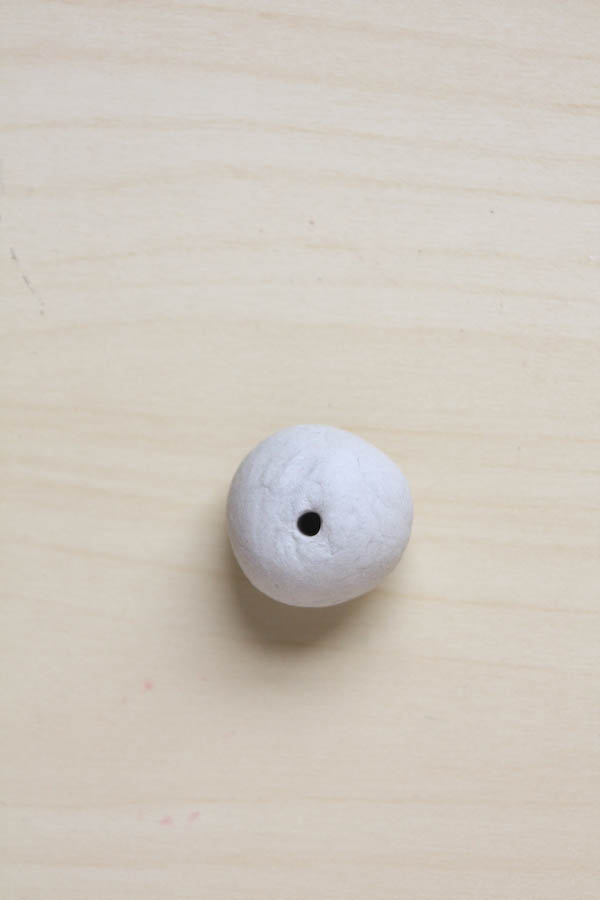
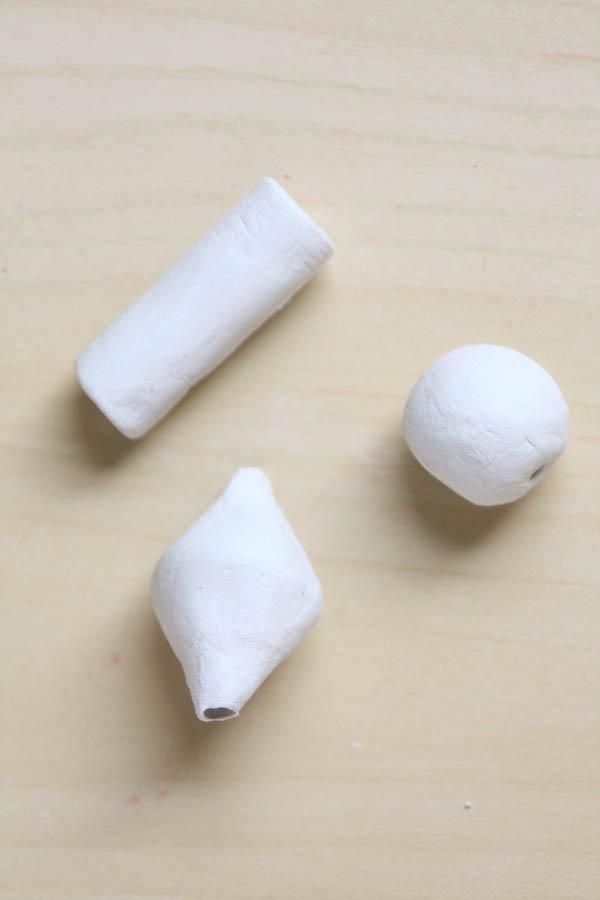
1.Take a piece of clay and roll into a ball. I wanted nice chunky beads, so mine was about 1 inch/ 2.5cm in diameter.
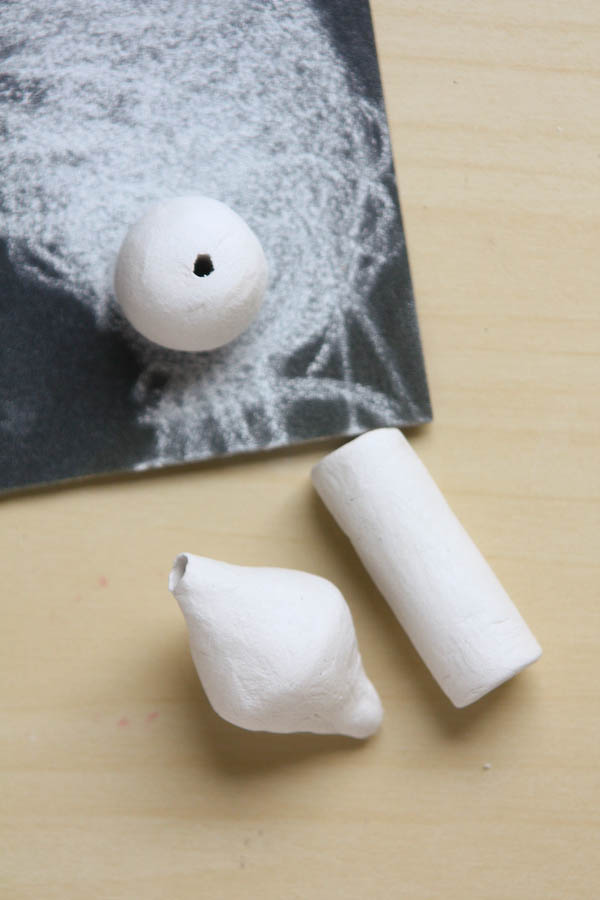
2.Use a cocktail stick to make a hole. If the hole is off center, just roll the clay up and have another go!
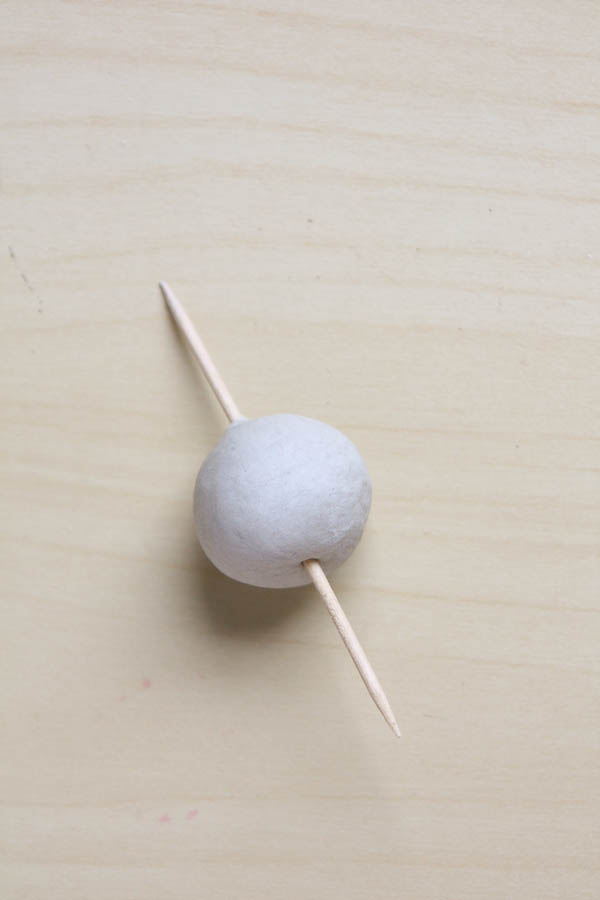
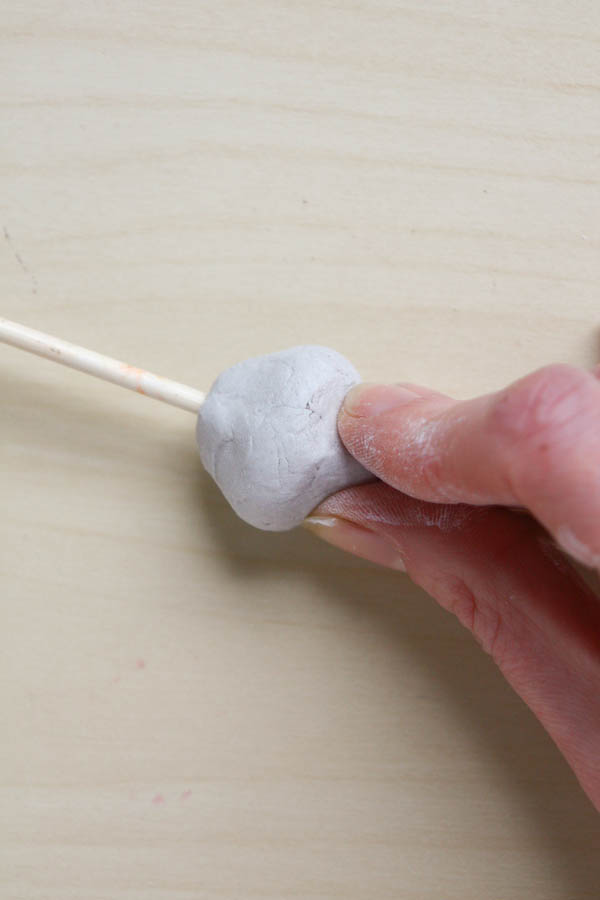
3.Because I wanted to thread my beads onto a 2mm cord, I used a bamboo knitting needle to enlarge the hole.

4.Refine the shape and smooth any marks before sliding off the needle
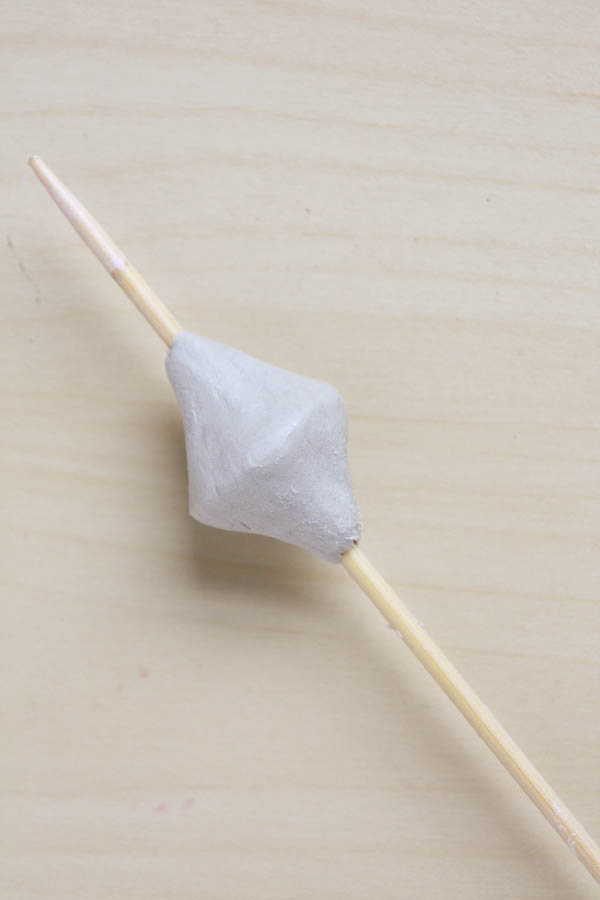
5.To create the bicone shape, roll into a ball and make a hole as you did for the round bead. Once on the knitting needle or skewer, pinch one side of the bead to a point. Repeat on the other side.
6.Smooth out any bumps, before removing from the needle.
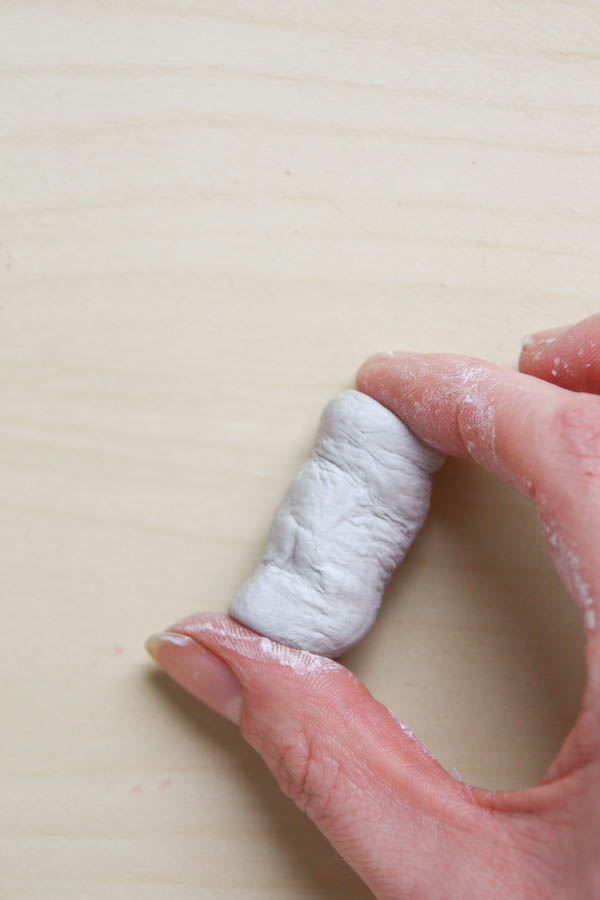
7.For the cylinder bead, first roll out a sausage shape

8.Squeeze the ends together to flatten them.
9.Gently use the cocktail stick to make the hole, its really easy to go off centre with this shape! Use the needle or skewer to enlarge the hole before smoothing the surface.

10. Once you have made all your beads, leave them to dry for a few hours.
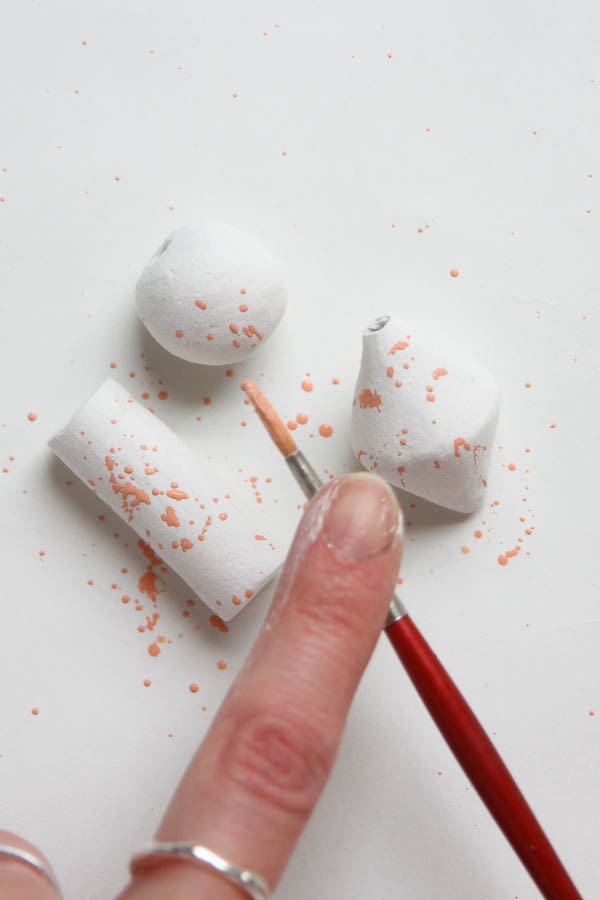
11.Once they are totally dry, use a very fine grade sandpaper over the surface of the beads.
12.Cover your work surface, its about to get messy! Mix up your first colour- I added orange and a bit of pink watercolour to some opaque white acrylic paint and watered it down. Load your brush with the paint and tap the paint off onto the beads! The beads are quite porous so the paint will dry within a few minutes. Turn the beads around to cover all sides.
13.Once the first colour is dry, mix up your second colour. I went with pale green, again mixed with white and watered down. Again tap or flick the paint onto the beads, leaving one side to dry before turning them over to do the other side!
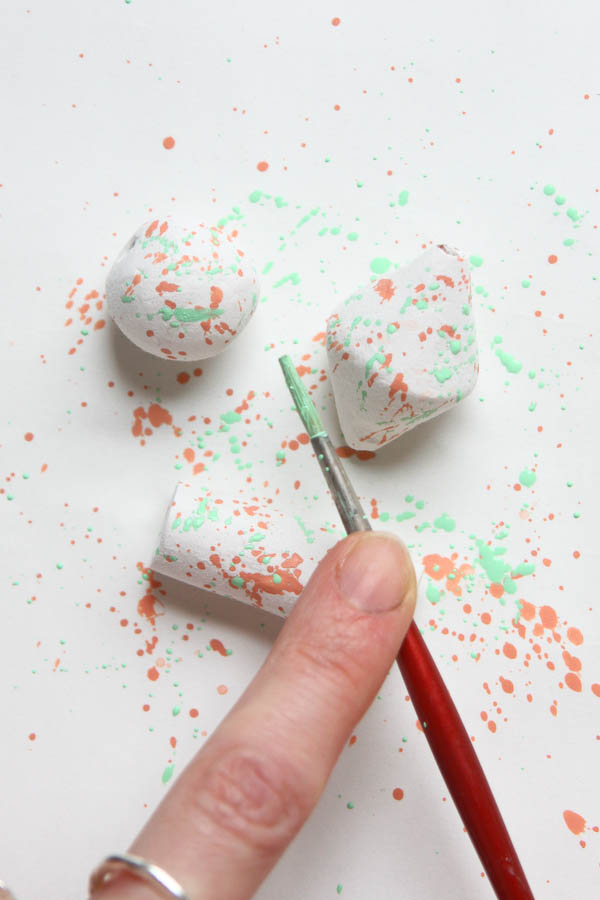
14.Keep turning the beads around and adding more paint if needed.
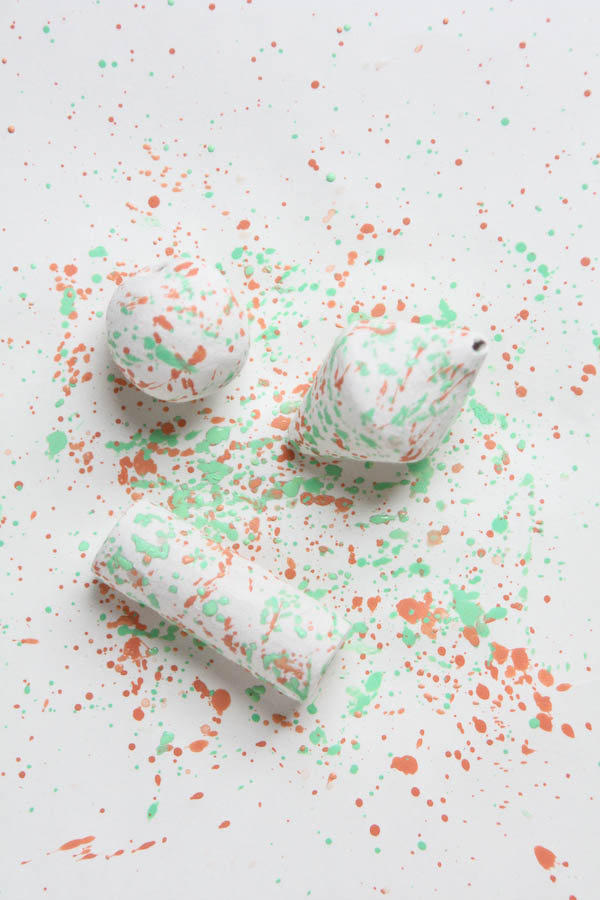
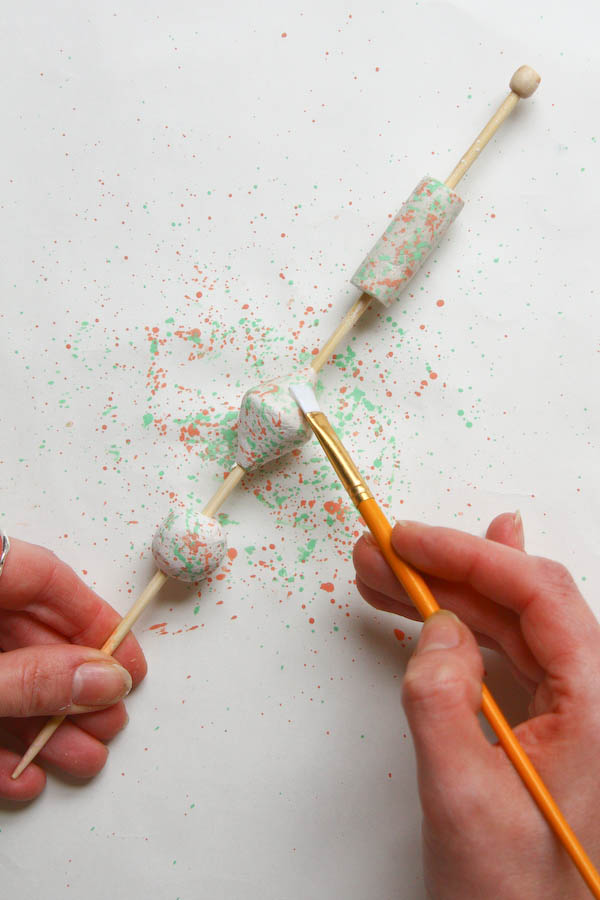
15.When all the paint is completely dry, apply a coat of varnish to protect the paint and give a nicer finish. Place the beads back onto the knitting needle or skewer to paint on the varnish. You can also use a spray sealer if you prefer! Leave to dry.
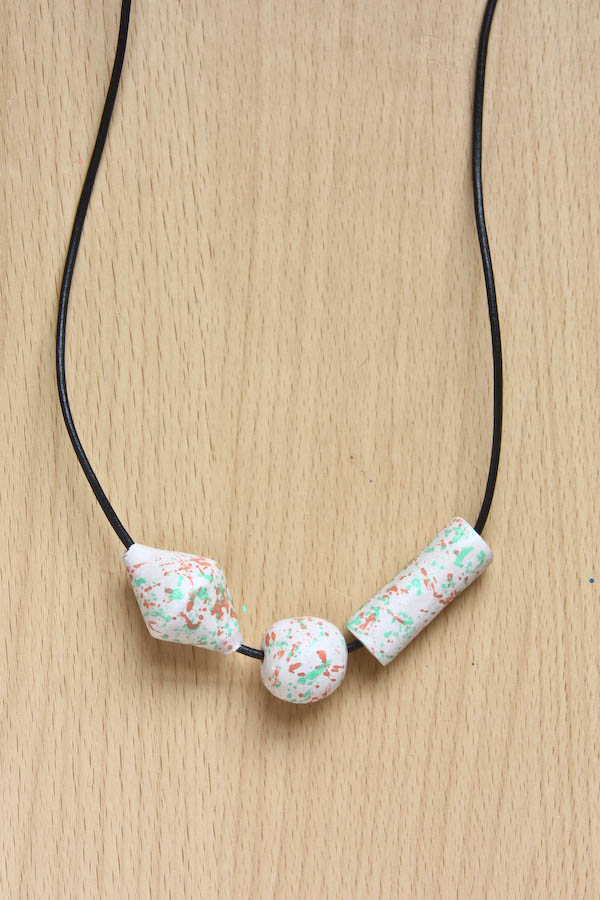
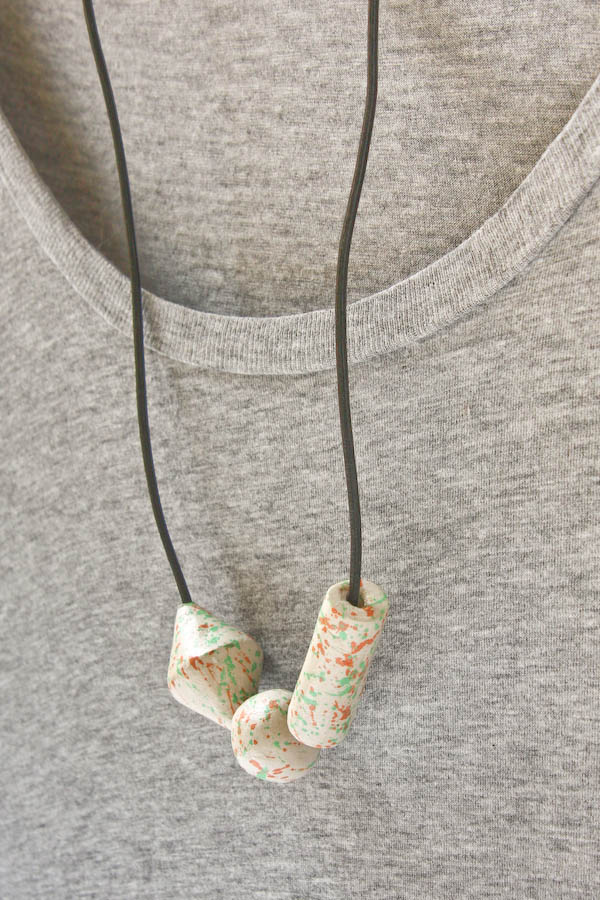
16.Thread onto some cord or a necklace and you are done!
If you have a go at making your own Air Dry Clay Beads, or have any questions feel free to comment below or message me on Twitter, Instagram or Facebook! And if you don’t want to miss out on any future tutorials, I’d love for you to sign up to my monthly email! Happy Making!
***Products marked with are * an affiliate link. This means that I earn a small fee if you buy a product using that link. I will only ever link to a product that I have used and personally recommend***
Could you do a decoupage technique on the beads?
Yes, once air dry clay is dry the surface would work really well with decoupage!
Thank you!
Those air dried clay beads look nice. Since they haven’t been put in a kiln, do you have to be gentle with them? Will they break easily?
No, they are really quite robust once dried!
Pingback: 11 Cool DIY Polymer Clay Bead Projects