

Make these cute and colourful plant markers for your garden or houseplants.

I live just outside Nottingham city centre, near a busy main road. I don’t have proper garden, just small front and back yards. I let the front grow wild, a small beech tree self seeded a few years ago and there are what most people would call weeds growing in between the paving slabs. But these ‘weeds’ are always buzzing with insects this time of year. The back is a courtyard really, but has lovely purple slate on the ground and a white washed brick outhouse running along the back. I have filled it with pot and planters around the edges. It is tiny, overlooked and has the constant sounds of the urban world close by, but is my little oasis. I love getting out into the countryside or even just my local park, but having my own space right out of the back door feels like such a luxury.
When I heard The Wildlife Trust was planning on a month of activities during June called 30 Days Wild, to encourage people to get out do something wild every day, I immediately signed up. I may not manage every day, but I’m going to try! Follow me on Instagram and Twitter to find out what wild things I get up to with the hashtag #30DaysWild. And to kick off, I’m getting out into my tiny urban back yard and making markers for some insect friendly plants!
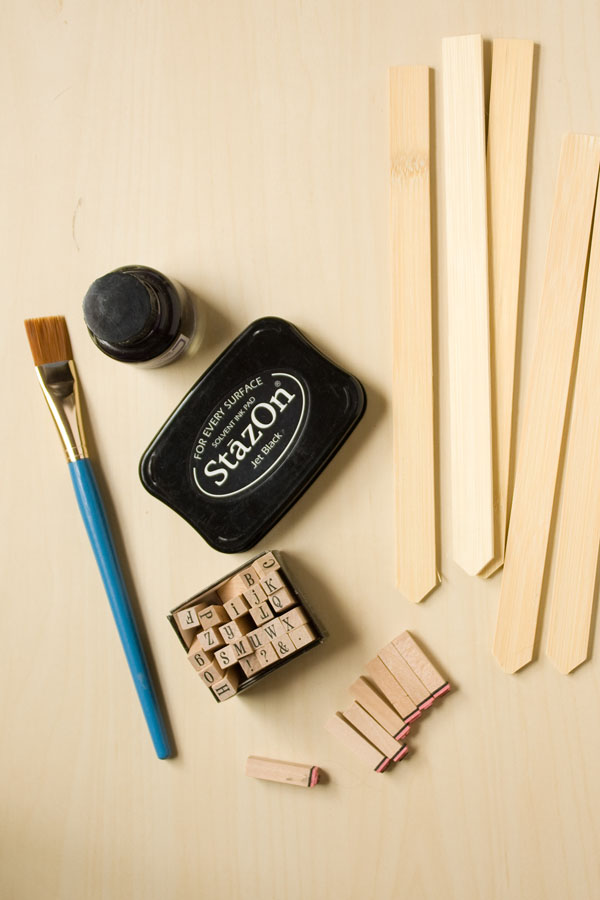
You will need:
–Coloured Ink, (watered down acrylic or watercolour paints will also work)
–Ink pad in a dark colour (I’m using Staz-on solvent ink in black)
-Paint brush
-Water container
-Paper or kitchen towels
-Clear spray paint / sealer
How to:
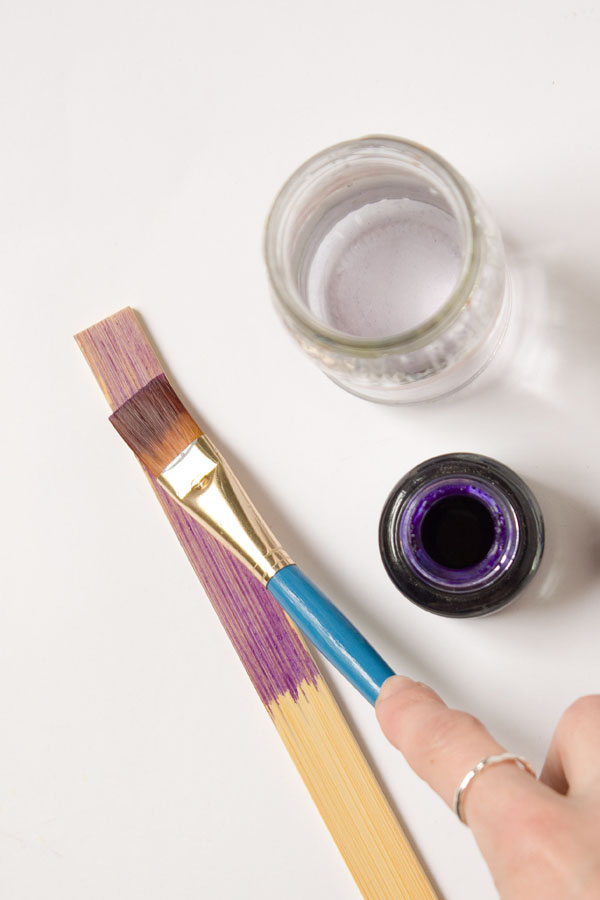
1.Soak your plain plant markers in some water for a couple of minutes before begining to help the paint or ink spread.

2.Dampen your paintbrush, and dip in you ink. Brush the ink down the marker to about halfway.
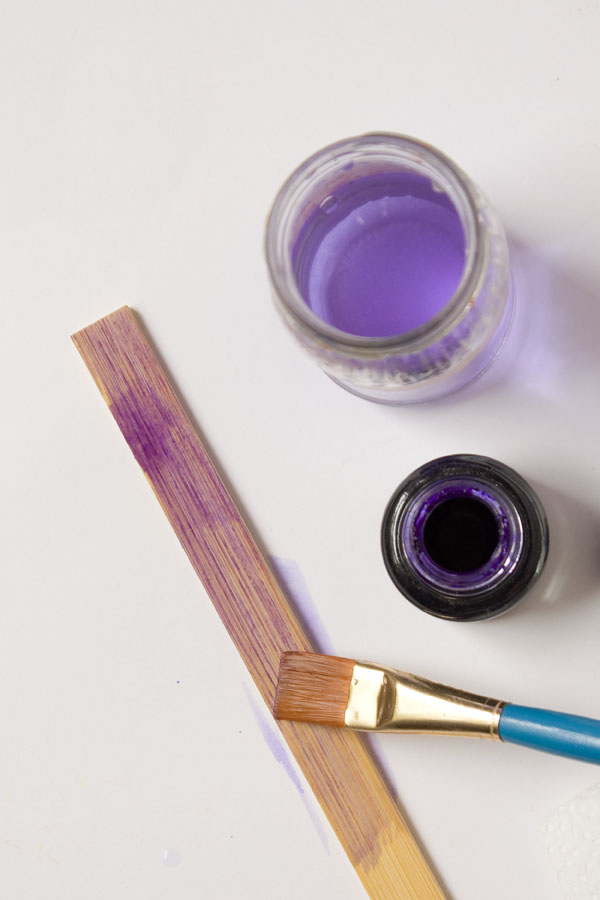
3.Apply some water to the point were the ink stopped and blend so the colour fades out; you can use a piece of kitchen towel to remove excess water.
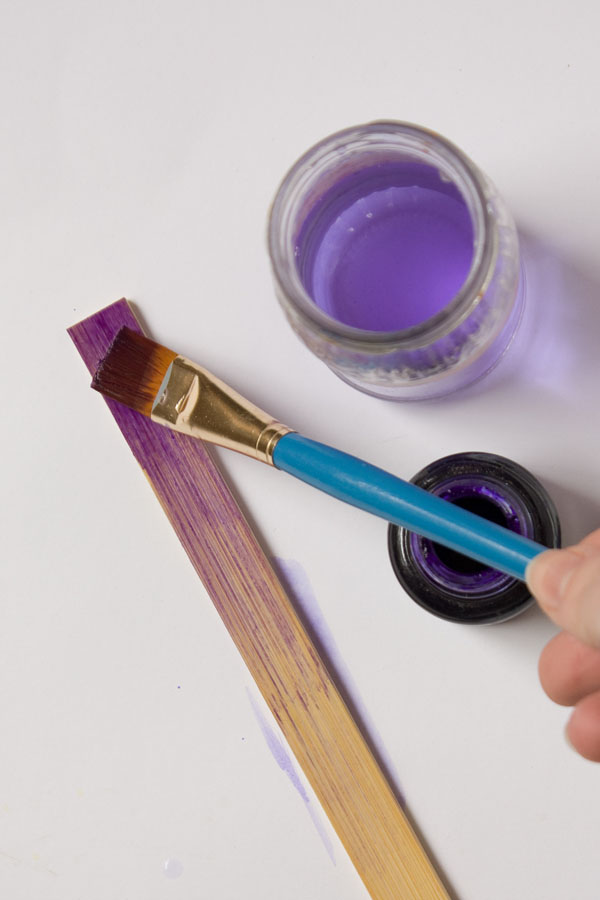
4.Dry off the brush and pick up some more ink and apply just to the top of the marker to darken. Leave to dry.
5.Take out the individual letter stamps that you need and stamp out the name of your plant. In true Make and Fable style, I didn’t worry about it all being level :0)

6.Once the ink is dry, put a coat of clear sealer over the marker.

7.Once the sealer is dry you can get out into the garden, or backyard in my case!

If you have a go at making your own Ombré Plant Markers, or have any questions feel free to comment below or message me on Twitter, Instagram or Facebook! Happy Making!
what a lovely idea and easy to make too
Thank you! Emma x