

I love giving people handmade cards, but I don’t always think to check that I have an envelope to fit my finished card, and often end up putting it into a very boring office envelope. Kinda ruins the effect doesn’t it? Especially hen you have chosen gorgeous wrapping paper for the gift. So why not create matching envelopes from wrapping paper, even if you don’t have the correct sized envelope to use as a template!When the lovely people at Dotcomgiftshop sent me some samples of their new wrapping paper range I got very excited! Not only are the patterns amazing (you could easily just put a sheet in a nice frame and hang it the wall!), but the paper is such good quality. In fact it looks so good, that there is no way you would want to wrap a present up in this paper and then give a card in a boring envelope along with it! So follow the steps to make an envelope template and you can make pretty envelopes out of any paper you want!
***Disclaimer: I was gifted the wrapping paper, but was not asked to write about the product or paid to do so. Opinions are, as always, my own***

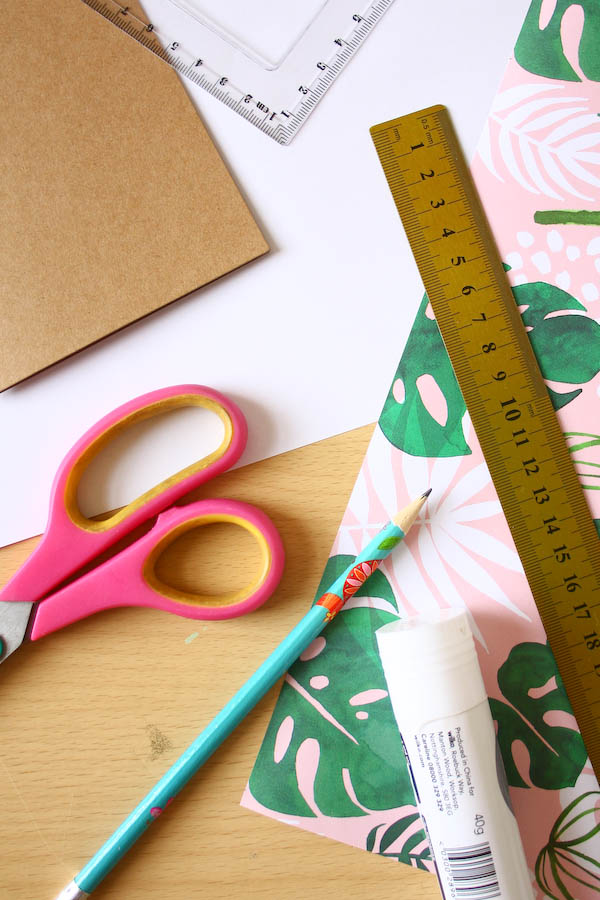
You will need:
-Wrapping paper
-Ruler and Square
-Scissors
-Pencil
-Glue stick
How to make:
1.First we are going to make a template from a sheet of computer paper. Put the card that you want to make the envelope for in the top right corner of the paper. Put a small pencil mark where the shortest side ends, flip the card around and do the same. You should now have two marks, equal distance from the corner.
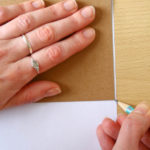

2.Make another pencil mark 1cm further away from the corner on both sides.
3.Draw a line between the second set of marks.

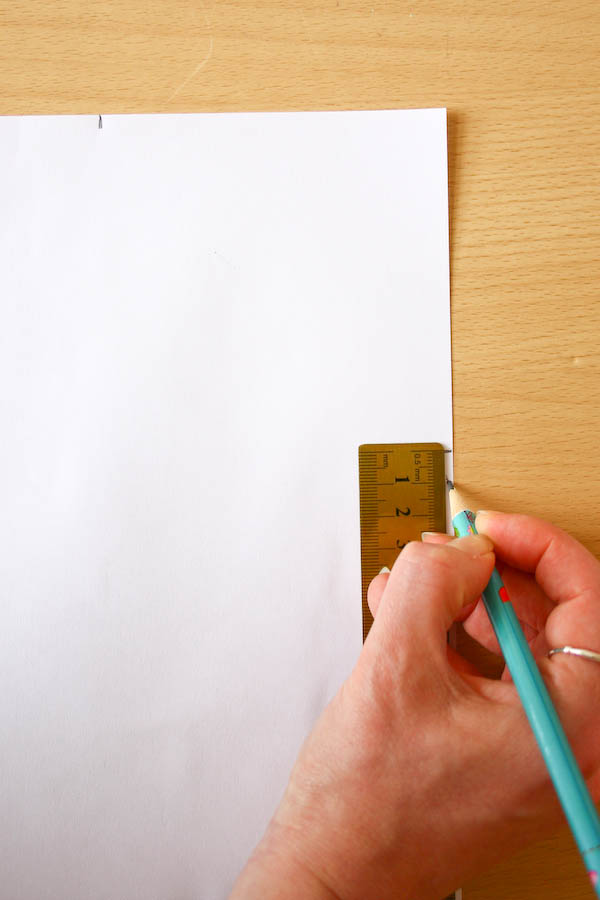
4.Put the card back on the template and up to the centre of the line you just drew. Put pencil marks in the bottom corners.

5.Now take the top corner and fold it down so the sides meet the marks from the last step.
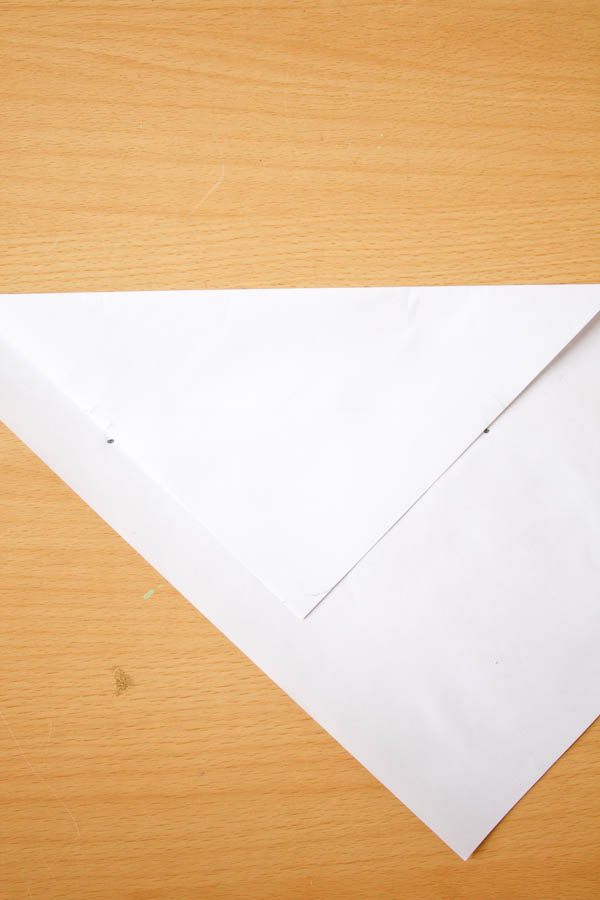
6.Draw along the sides
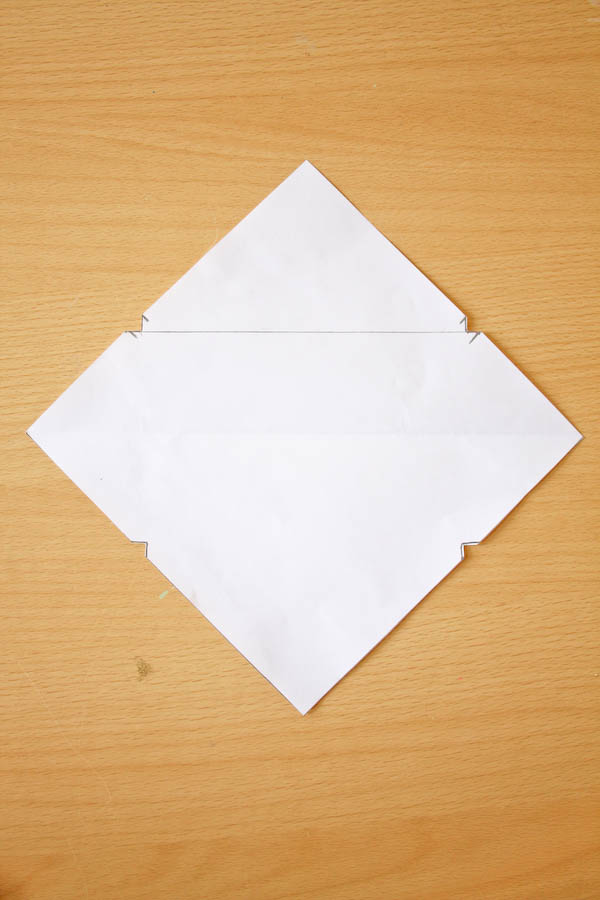
7.If you open the template back up, it should look a bit like this!
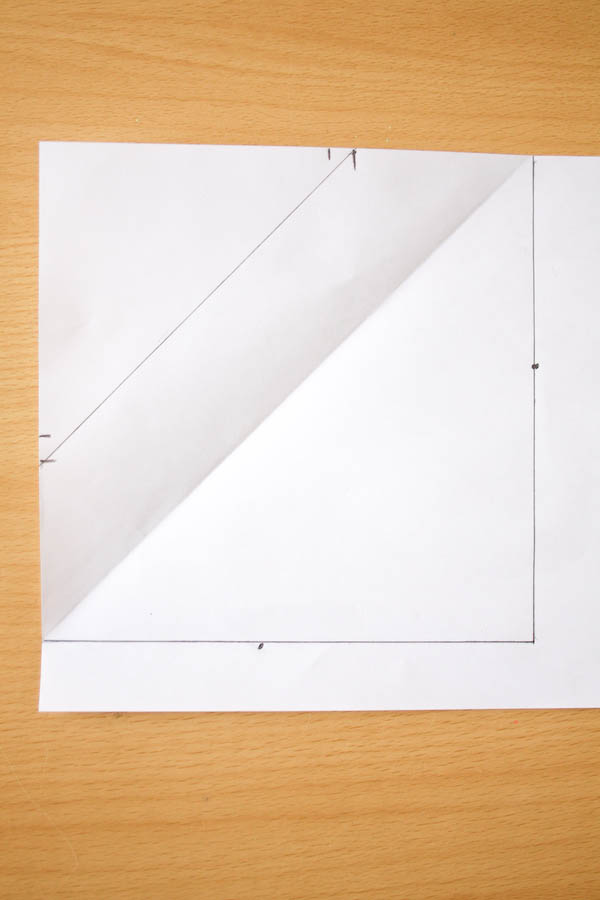
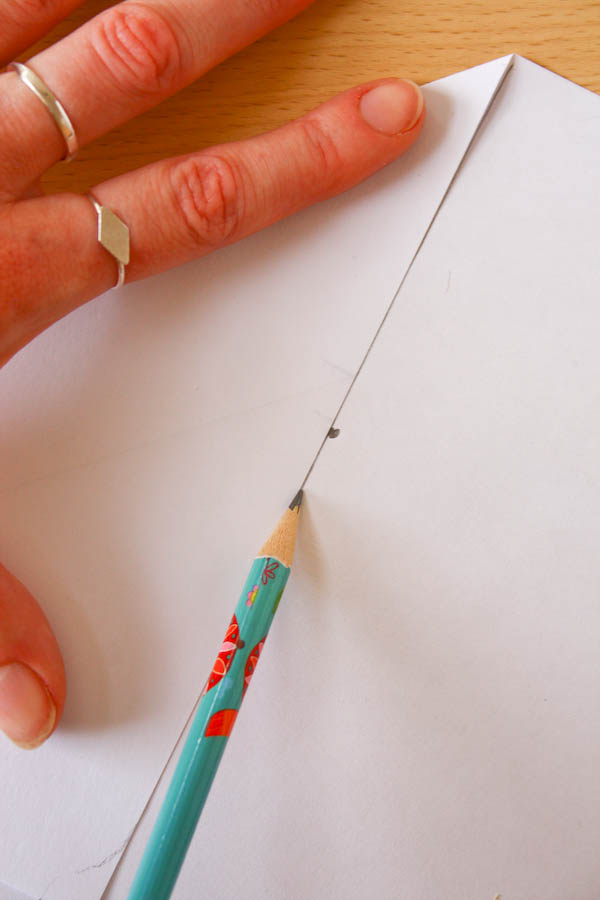
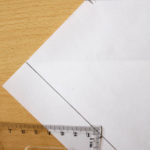
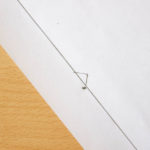
8.We need to make little notches at the corners of the template. To do this, take your set square and line it up on the line you drew in step 3 with the other side on the mark made in step 1, and draw a little triangle.


9.Then line the set square up on the pencil marks made in step 4 and draw another notch. Make sure the notch is on the outside of the marks.
10.Carefully cut around the template.
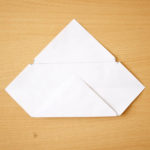
11.Fold the bottom up, then the sides. Now make sure that your card fits inside, that the top flap covers it and there will be enough overlap on the bottom three for a little bit of glue. If you need a bit more room, the best way to make it bigger is to draw around the template on another sheet of paper using a thick marker. Then cut around the outside of the marker line and check again.

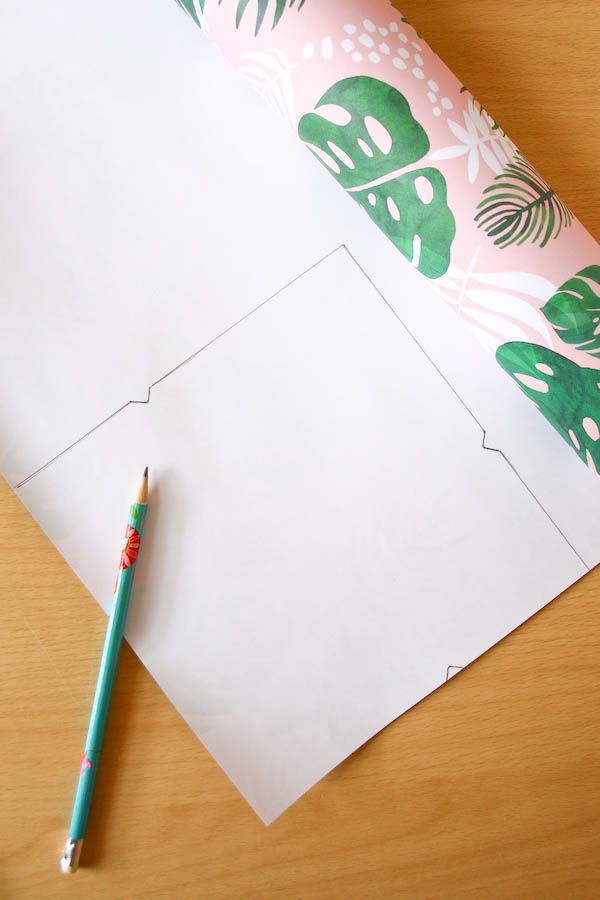
12.Once you are happy with the template, draw around the template on the back of your wrapping paper and cut out.
13.Fold the side flaps, and trim the point off the bottom for a neater finish.

14.Apply a little bit of glue to the side flaps to hold the envelope together.

If you have a go at making envelopes from wrapping paper, or have any questions feel free to comment below or message me on Twitter, Instagram or Facebook! And for even more DIYs and creative inspiration sign up to my monthly email! Happy Making!

Pingback: The Cutest DIY Envelope Liners • A Subtle Revelry
I got confused about step 5…I definitely messed up.
Oh no! Does the paper not meet the pencil marks when you fold it over ?
Can these envelopes be sent through the USPS?
THANKS,
Teri
Hi Teri, I’m based in the UK so I’m not sure what the USPS rules are on patterned and non standard envelopes. But as long as that’s not an issue, just make sure the paper you use is strong enough and tape it up well! Emma.
That’s a good question, Teri. I would be skeptical that the automatic scanning machines wouldn’t be confused by the paper graphics! I wouldn’t risk it.
Thank you for this amazing tutorial! My envelopes turned out lovely!
failed twice not sure why it doesn’t seem to work.
Oh no! What doesn’t seem to be working quite right?
Pingback: 15 DIY Envelope Ideas From Paper - Susie Harris