

Make your own Textile Bug brooch with this cute DIY tutorial! Using a small scrap of fabric and some beads, create this unusual wearable soft sculpture, perfect for Halloween!
Its the beginning of autumn here in the UK, which means three things. 1. I will get sick (that happened last week, so check) 2. People start mentioning c.h.r.i.s.t.m.a.s, and 3. Everywhere is full of scary and gaudily coloured Halloween costumes. The first two, I just have to roll with, but the third I try and turn it around into something more stylish – a pretty Halloween. Think gothic, dark florals and pumpkins rather than skeletons, witches and fake blood. To get an idea of my ideal Halloween aesthetic follow my ‘Pretty Halloween’ pinterest board.

You will need:
-patterned fabric
-thick cardboard

-felt
-selection of beads
-beading needle and thread

-scissors

How to:
1.Draw an egg shape onto the cardboard (greyboard is perfect). I made mine about 4cm high by 3cm wide. Cut out the shape.

2. Cut a piece of your fabric that is roughly 2cm bigger on all sides than your egg shape.

3.Take a needle and thread and sew a running stitch about 0.5cm away from the edge of your fabric, leaving at least a 10cm length of thread on each end. Your stitching doesn’t have to be that neat as we are just using it to gather the fabric and will be hidden under backing felt.

4.Pull the thread ends together to gather the fabric up (so it looks like a shower cap!) and stuff with wadding.

5. Place your cardboard egg shape on top of the wadding, and holding it in place, pull the thread tightly to hold it. Check that there is enough wadding in to give a nice rounded shape and then tie the thread together and trim off the excess. Its a bit fiddly as the wadding just wants to explode out!


6.Next we are going to stitch on a row of beads. Thread a beading needle with a length of thread, secure with a knot and a couple of stitches at the back and bring the needle out on the side of your bug, about 1/3 of the way around from the pointier (head) end.

7. Thread on about 5 seed beads, i’m using size 8 iridescent blue. I like to use the beaded backstitch method of bead embroidery, as I just find it neater, but there is nothing wrong with the couching method. To use beaded backstitch, lay the row of beads against the fabric and stitch back through the fabric coming up 2 or 3 beads back. Bring the needle through the beads again in the same direction as before so you are ready to add on more beads.


8.Continue adding beads in this way until you reach the other the side. Bring the needle through the wadding to the middle.

9.Follow the same steps as before to create a row of beaded backstitich down to the bottom.

10.Now its looking more like a textile bug! To add some definition use a sparkly thread to make long stitches in the spaces in between the beads.


11.Isn’t he looking cute? Time to add some legs and antenna. Cut 15cm of wire, 0.3mm or 0.4mm is best. Fold the ends into the middle, so it looks a bit like a folded staple. Hold the middle and twist one side until you have are left with a small loop. Repeat on the other side to create one set of legs. Repeat these steps another two times.


12.You can follow the same steps adding three seed beads to the loop at each end to make the antenna.
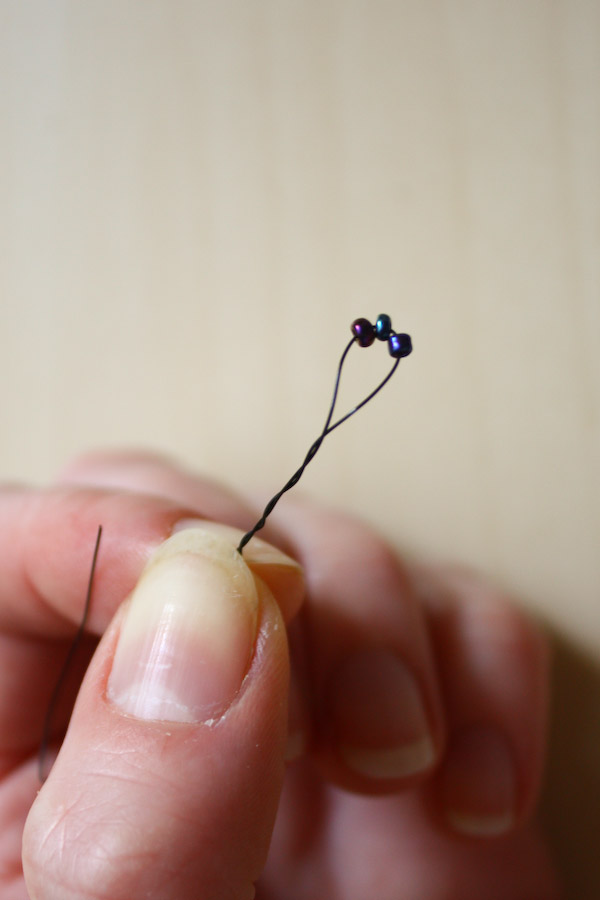
13.Stitch a brooch back onto a piece of felt that is just slightly smaller the back of the bug. I also tacked the antenna and legs in place, but you could also glue them down.

14.Glue the felt back onto the bu using a hot glue gun, pressing down firmly around the edges.
I tried a couple of different ways of decorating the bugs, including just using bead embroidery and adding wings using semi-circles of fabric backed with felt!

If you have a go at making your own textile bug brooch, or have any questions feel free to comment below or message me on Twitter, Instagram or Facebook! Happy Making!


***This project contains some affiliate links. This means that I earn a small fee if you buy a product using that link. I will only ever link to a product that I have used and personally recommend***
merci pour ce tuto j’aime tellement les broches “naïves” en tissus. les vôtres sont attendrissantes. encore merci.
Thank goodness, I found you again – I mean the beetles. I made some but did not save the how to. I gave them away. and must have more of those fantastic little beasts.
Thank you!