

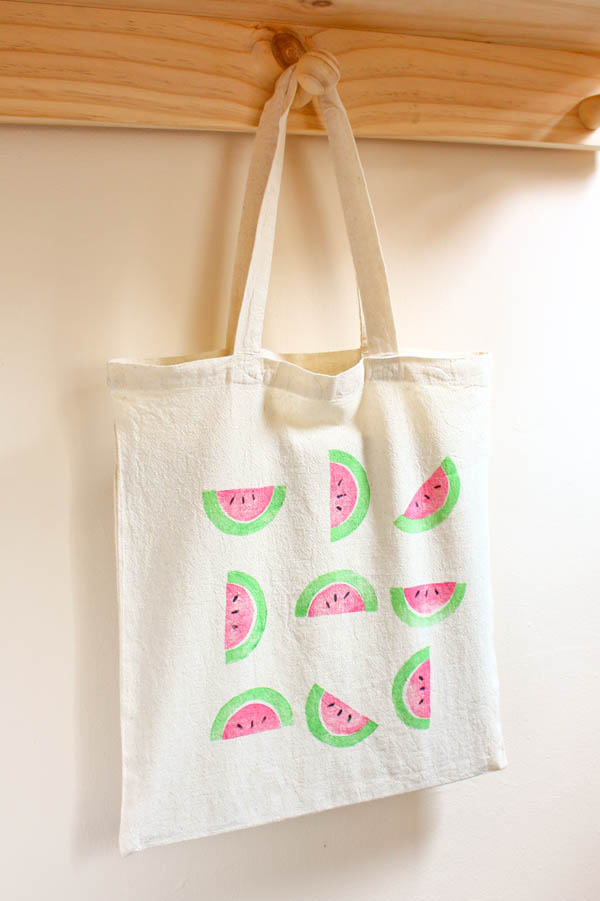
This fun watermelon print DIY tote bag is perfect for taking to the beach or park on sunny days.

I am still loving the watermelon trend, it just shouts summer doesn’t it? I have been dying to make a easy print tutorial for a while and watermelon is an easy shape to make a stamp for. This DIY is super simple and requires no special painting skills or expensive equipment.
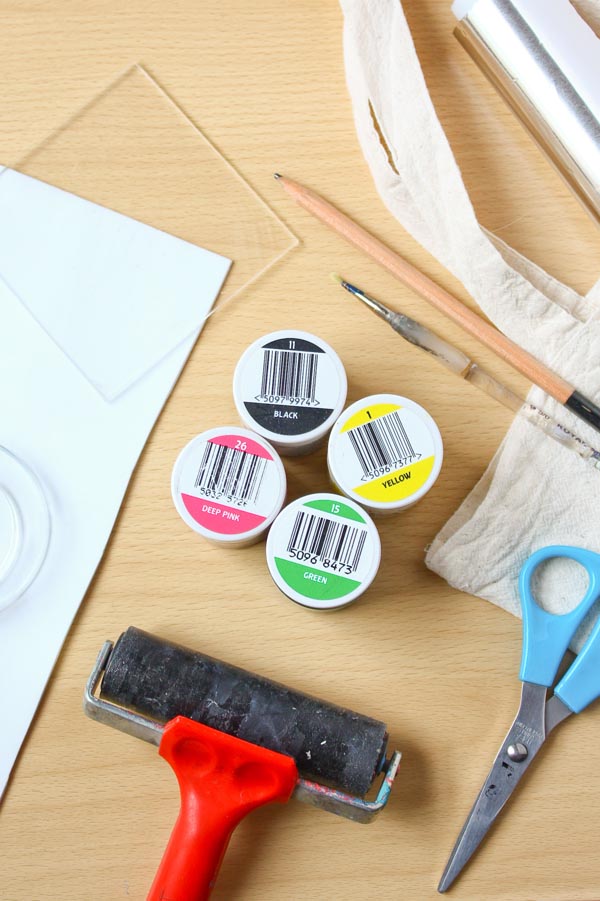
You will need:
-Fabric Paint in Pink, Green, Black and a bit of Yellow, I used Dylon brand paint.
-Acrylic block/sheet or even a blank CD case.
-Fine paintbrush
-Pencil, Ruler and Scissors
–Print Roller or Foam Brushes
-Spray Adhesive, preferably re-positionable & low tack.
-Scrap cardboard or paper to go inside the bag
-Household Iron
-Optional, aluminium foil or plastic wrap.
How To:
*Before starting I highly recommend washing and ironing your blank bag. Sometimes they can have residue or starch which can affect paint and any creases will stop the stamp from being clear. Trust me, it does make a difference and I only ever iron something if I really, really need to!*
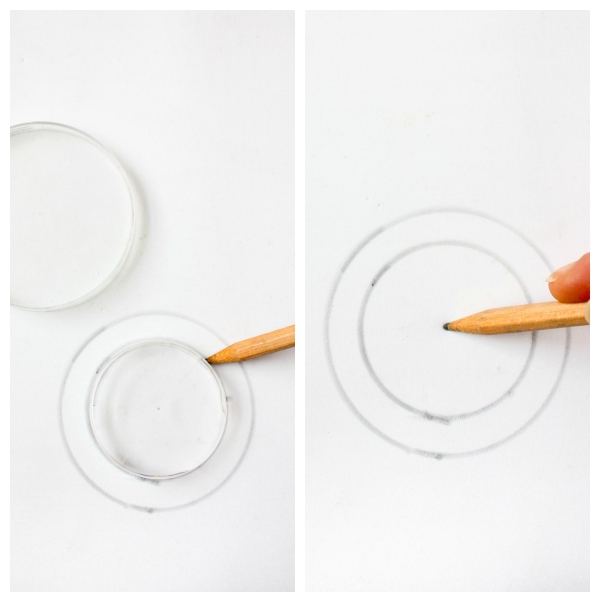
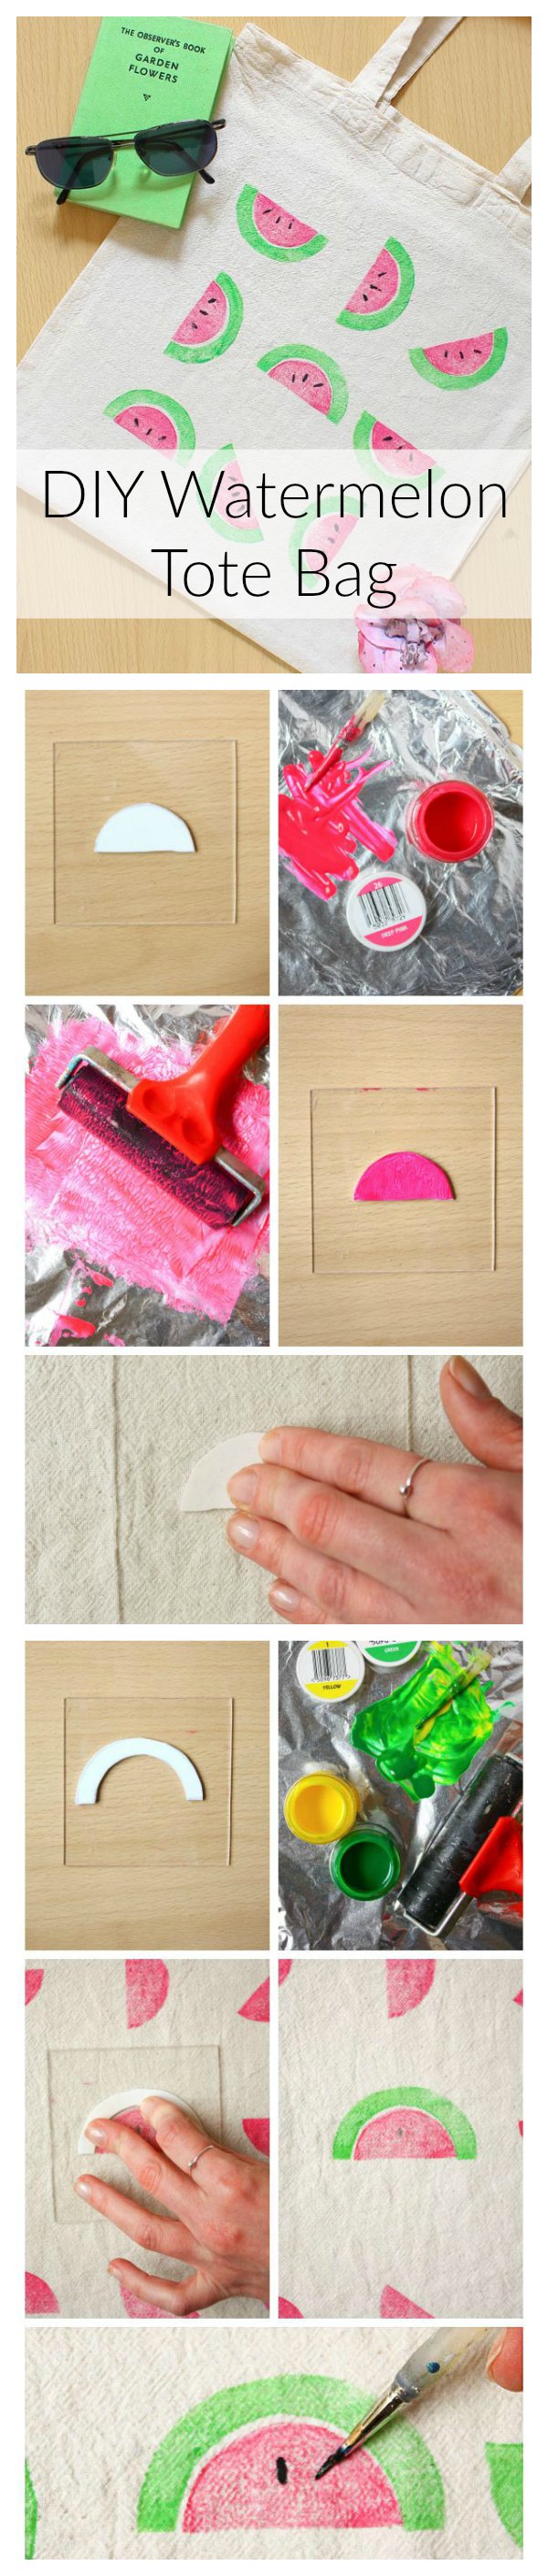
1. Cut out a circle of fun foam and draw a smaller circle inside it. I used the lids from my clear storage stackers to draw around for this. Fine the middle and mark with a dot.
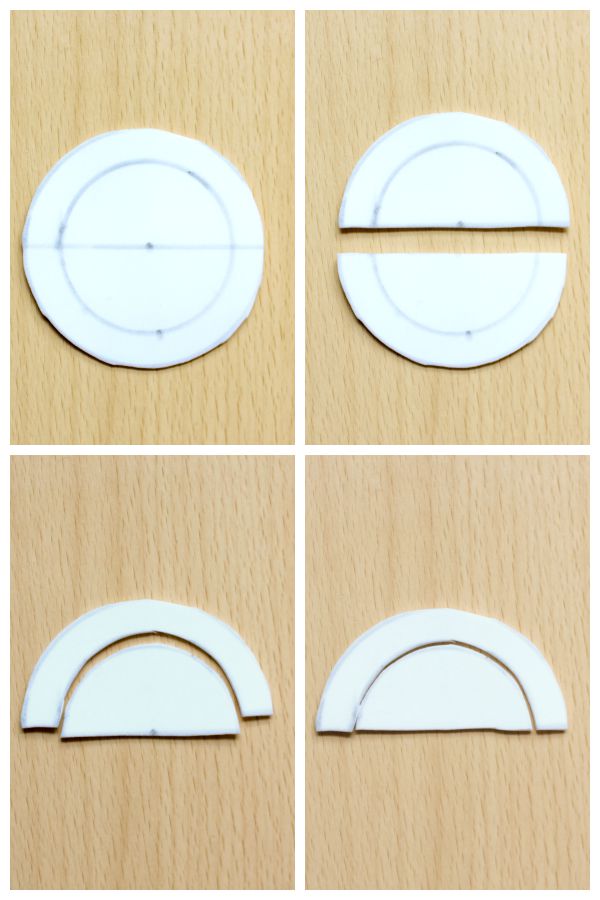
2. Draw a line through the dot and cut in half along it. Then cut along the line between the two circles. To create a small gap between the two section when we print, trim off a couple of millimetres along the bottom of the smaller semi-circle.
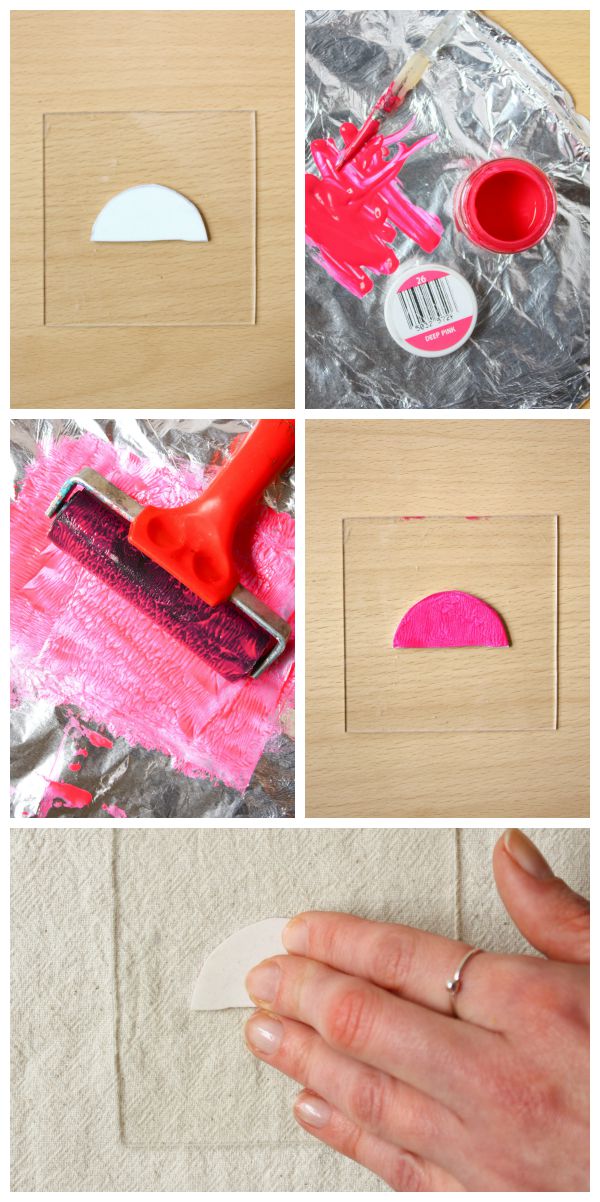
3.Use a small amount of spray glue (I like the removable, low tack one for this)to attach one of your semi-circles to the acrylic block/empty CD case. Pour out a small amount of pink fabric paint onto a smooth surface. TIP To make clean up easier, cover a piece of cardboard in aluminium foil or plastic wrap! Use your print roller or foam brush to spread the paint out so you have a thin layer, you need a lot less than you think.
4.Put a sheet of scrap cardboard or paper inside you bag to prevent the paint bleeding through to the back! Mark the middle with a pencil, apply the paint evenly to the stamp with the roller/brush and put your first stamp on top of the mark. Don’t worry that you can see the pencil through the paint, as it will be covered up by a seed later! Repeat to create your desired pattern, reapplying paint each time if needed.
5.Clean up your brush, roller and put a clean piece of foil or wrap on your board and pour out some green fabric paint. I found mine was a bit dark to added a little yellow. Roll/brush out and apply to the stamp as before. Stamp next to each of the pink semi-circles made in the previous step.
6.Dip a fine paintbrush into the black fabric paint and dab the side onto the fabric to create the seeds.

8.Most fabric paints require ironing to set. Follow the instructions for the brand you are using. For the Dylon, it recommends covering the painted item with a clean sheet and pressing for 90 seconds.
If you have a go at making this tutorial let me know on Twitter,Instagram or Facebook so I can share with everyone! I love seeing your makes  Happy Making!
Pingback: DIY Watermelon Print Bag – Indie Crafts
Pingback: Fruity Clothes and Jewelry – Craft Collector
Pingback: Depois Dos Quinze | DIY: projetos com formato ou estampa de melancia
Pingback: 7 Ways to Jazz up your Tote Bag
Pingback: 35 Fabulous DIY Beach Tote Bag Ideas for the Summer