

A clean and simple wire wrapped ring, with a gorgeous Swarovski coin pearl bead as the main feature.

In my day job working at my local bead shop, I have had quite a few people ask me how to make wire wrapped rings. Most ways involve quite a bit of wire being on show, which is fine, but creates a reasonably chunky ring. Someone asked me if there was a way that resulted in a more dainty band and allowed the bead to be the star of the show. At the time, I couldn’t think of a single one! Never one to back down from a challenge, I set about coming up with how to a wire wrap a bead onto a simple ring band, and this was what I came up with.
You will need:
-1mm thick wire for the main ring
–0.4mm thin wire for the wrapping
–10mm Swarovski coin pearl in white (update – alternative supplier!)
–Round nose and Chain nose pliers
-Optional ring mandrel, but a chunky marker pen or similar will also work

How to:
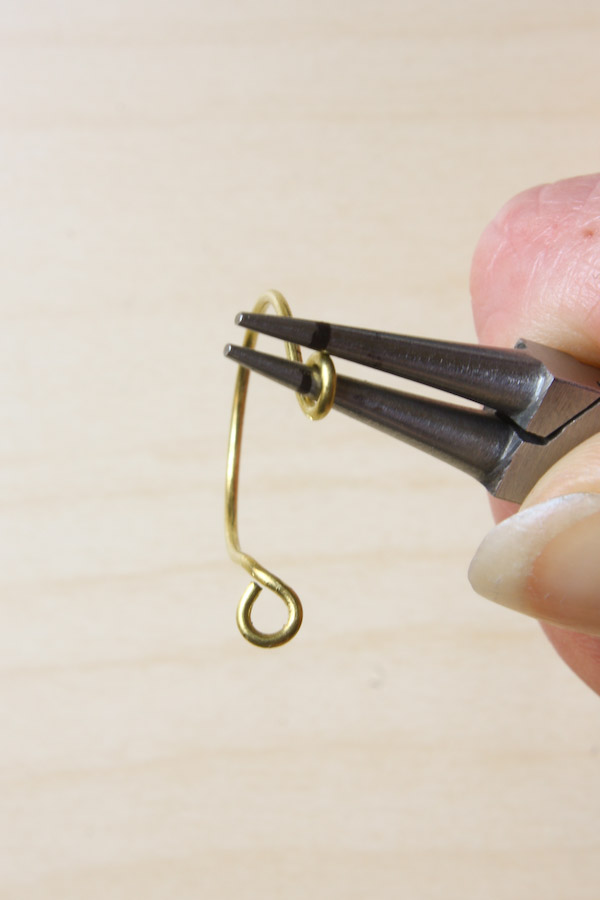
1.Cut a 10cm length of the 1mm wire. I’m using solid brass. Step a) Grip the end of the wire with round nose pliers b) Roll the wire around the jaws until the end come back on itself c) Hold the loop you have just made with chain nose pliers and bend it so the loop sits centrally, like a lollipop! d) Bend the loop up at a right angle


2.Hold the end of the wire with your loop tight against the mandrel (or marker pen!) and smooth the rest of the wire around. If you are using a mandrel with size marks, do this a size down from the one you want as most wire will spring back out a little bit.

3.Slide the wire down to the size you want and using your flush cutters trim the end of the wire to where it just touches the loop


4.Take the ring off the mandrel and roll another loop on the end of the wire. You might be wondering how I goet the loops the same size and in the right position? You see those marks on my round nose pliers? Well, not only can I use those to make loops of the same size, but I know that loops made on that mark take up 10mm of wire. This creates the perfect size gap because our Swarovski bead is 10mm. Clever huh?
5.Bend this second loop so it is central and at the same angle as on the other end.

6.Cut a 30cm length of 0.4mm wire and secure one end to the top of a loop by neatly wrapping around a couple of times.

7. a) Thread your pearl onto the long end of the wire b) wrap the wire around the opposite loop and take the wire back through the pearl c) so you are back where you started d) wrap around the loop, go back through the pearl, wrapping around a couple of times to finish.


8. Cut off the excess wire and neaten up the ends and the wraps if needed.


If you have a go at making your own wire wrapped pearl ring, or have any questions feel free to comment below or message me on Twitter, Instagram or Facebook! Happy Making
Pingback: How To Make Finger Rings
Beautiful!
I love making wire wrapped rings and i especially like this one because it looks elegant, simple and so easy to make. Thank you for sharing it with us.
This is the best idea ever. I know that I am going to try this. So glad to see this ring.
Great job
Thanks for the great tutorial. It is a beautiful ring you designed. All the best…
I know my daughter-in-law will love this. Thank you for sharing this wonderful technique!
Pingback: 24 Simple DIY Rings Everyone Will Love - Ideal Me
Wow, that’s an amazing talent you have 🙂
Hi love this ring idea , can you tell me how do u finish the wrapping of so it doesn’t unravel its self
Hi Sally, the wire should stay wrapped. The only reason it might come loose is if the end gets caught, but if you make sure that the end is as neat as possible it shouldn’t happen.
Could you explain what the equivalent wire measurements are in mms.? Thank you..very nice ring will make several if I can find out the wire sizes……
1mm wire is equivalent to 18 gauge and 0.4mm is about 26 gauge. Hope that helps, Emma
Pingback: 40 DIY Ring Ideas For Ladies In 2022 - DIYS